Blog

  • Wood Movement in Furniture: What to Record Before Asking for Help

    Wood Movement in Furniture: What to Record Before Asking for Help

    A gap, seam, or change in fit is worth documenting, but it does not identify its cause or prove whether the furniture is defective. Wood can change dimension as its moisture content responds to the surrounding air; what you see depends on the particular wood, component, grain direction, and construction. Record the part, the timing, what changed, and whether the furniture still functions as expected. Then ask the maker about that specific piece instead of trying to diagnose or adjust it yourself.
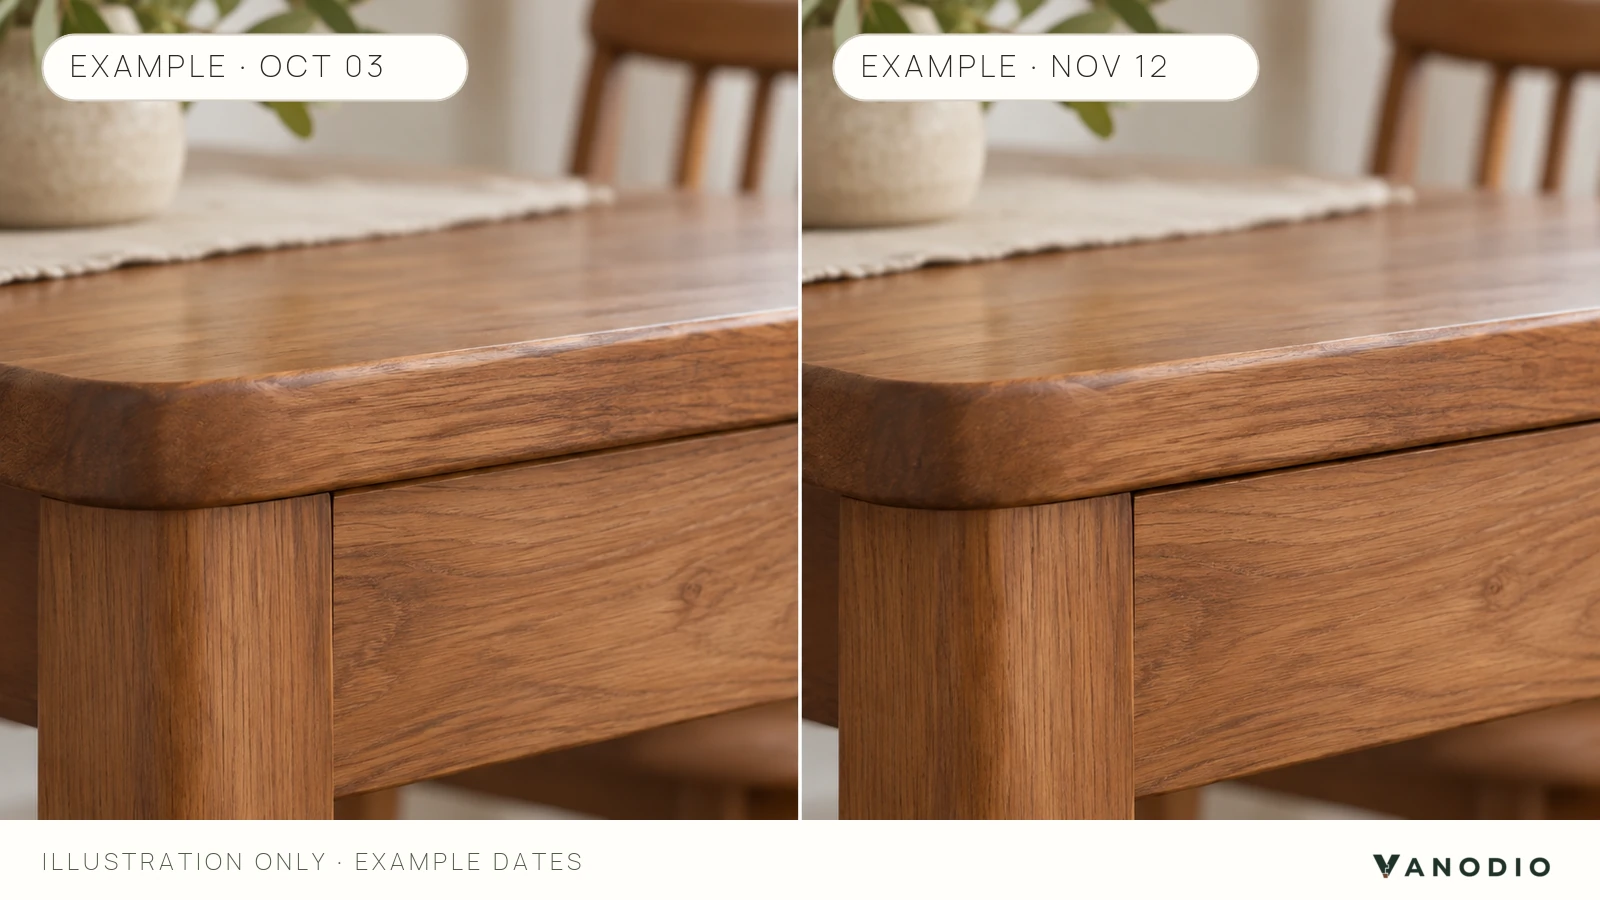
    Generic wooden table corner shown in two labeled example observations, October 03 and November 12.
    Illustration only: the same generic furniture detail is shown on two example dates; the views do not establish a cause.

    Wood takes on or loses moisture in response to the surrounding air. As its moisture content changes, its dimensions can change too; the direction and amount depend in part on the wood and how each part is oriented and built. A finish may slow moisture exchange, but it does not stop it. Purdue Extension’s furniture guide explains these general material behaviors; it does not provide a universal pass/fail rule for every furniture item.

    The useful next step is a clear record, not a guess about humidity, workmanship, or warranty coverage. A photo can show a visible seam or a drawer that no longer moves the way you remember. It cannot reveal the full construction or, by itself, settle what caused the change.

    Why a visible change is not a diagnosis

    A wooden part may respond to changes in the moisture around it. But furniture is made from parts with different shapes, grain directions, finishes, and connections. Those details affect how a change appears at a joint, panel, edge, or opening. Two pieces can therefore show different visible details without those details having the same explanation.

    Timing is useful context. You may first notice a change after moving a piece, changing how a room is heated or cooled, or returning to it after a season. Record what you know and what you do not know. The timing may help the maker understand the situation, but it does not prove that a room condition caused it.

    Do not label a gap “normal,” “damage,” or “a defect” based on appearance alone. Those conclusions may depend on the exact design, materials, assembly, finish, history, and the maker’s documentation. This guide does not set acceptable gap sizes, humidity targets, or a universal movement tolerance.

    Start with the furniture and the exact part

    Before taking photos, identify the item as clearly as you can without guessing. Note the product name or order reference if you have it, when you acquired it, and the room where it is used. If a detail is unknown, write “not known.” Do not infer a species, solid-wood construction, finish, or internal joint from the appearance of a surface.

    Next, name the location in plain language: for example, “left side of the top near the back corner” or “the upper drawer on the right.” Use the same description each time. If the furniture has multiple similar parts, note which one you mean. This helps the maker compare your description with the construction information for that item.

    If you are also comparing construction descriptions before buying another piece, our component-by-component guide to solid-wood and veneer furniture explains how to record what a listing actually specifies. That guide covers a different question; this one is about documenting a change in a piece you already have.

    Keep a simple observation log

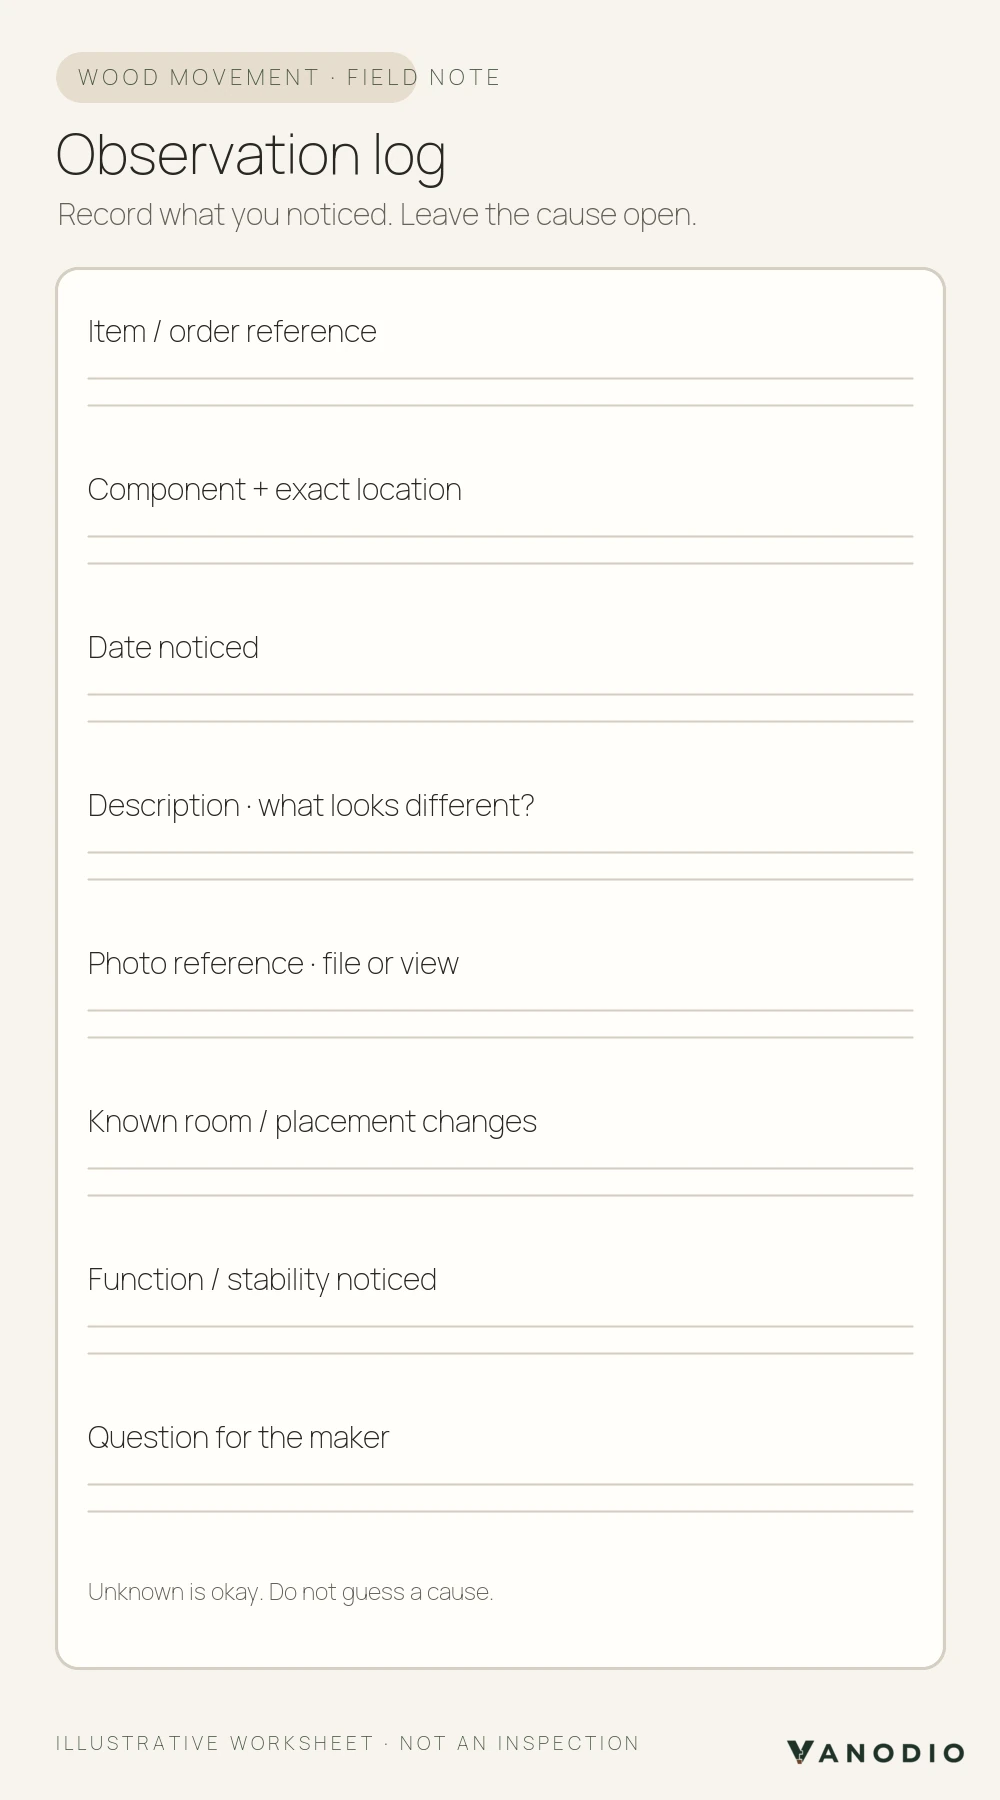
    Use one row for each observation. Record only what you saw or experienced. Add a new date when you notice a change; there is no need to invent a check schedule or to force a part through its movement to see what happens.

    Field What to record
    Item reference Product name, order reference, or “not known”
    Component and location The exact part and where the visible change appears
    Date noticed When you first saw it, and the date of each later observation
    Description What looks different, in neutral words; avoid a diagnosis
    Photo reference File name or short label for each photo and its view
    Known room or placement changes What changed, if anything; write “none known” or “not known” when appropriate
    Function or stability Whether opening, closing, support, or use has changed; describe what you observed
    Question for the maker The specific information or next step you need
    Blank wood-movement observation log with fields for item reference, component location, date, description, photo, known room changes, function, and question for the maker.
    Illustrative worksheet; record observations and leave the cause open.

    Keep an earlier photo if you have one. Do not edit it in a way that changes the visible detail. A brief caption such as “wide view, first noticed” or “same corner, later observation” is more useful than a conclusion like “humidity damage.” If you do not have an earlier photo, start with the present condition; do not recreate one by moving, tightening, or disassembling the furniture.

    Photograph what you can see

    Take a wider view that identifies the furniture and the affected area, followed by a closer view that shows the visible detail. If you notice a change later, try to use a similar angle and lighting so the two views are easier to compare. Keep the original files and label them with their dates or log references.

    Do not scrape, sand, scratch, pry, loosen hardware, remove a panel, or force a drawer just to make a photo clearer. Do not place weight on a questionable part as a test. Photos are documentation, not an inspection of hidden structure or a substitute for the maker’s assessment. If stability or function appears compromised, stop using the piece and ask the maker for guidance before trying anything else.
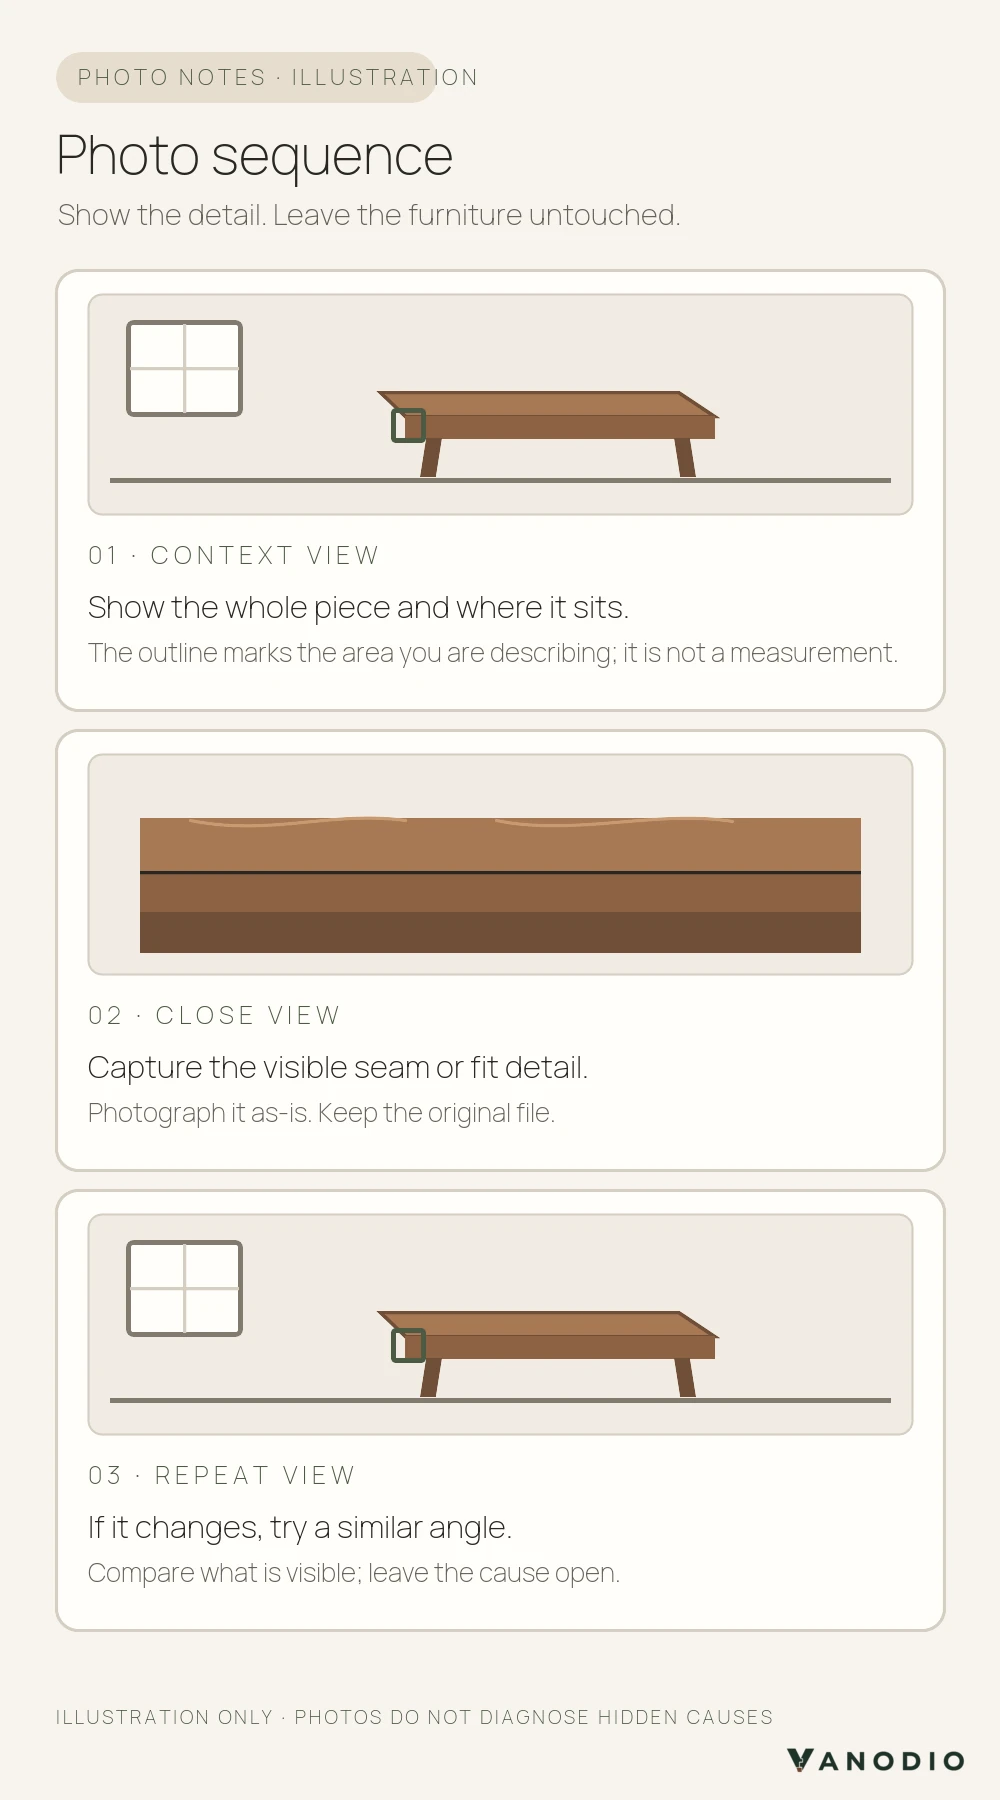
    Illustrated photo sequence for documenting wood furniture: context view, close view, and repeat view from a similar angle.
    Illustration only: photos document visible details; they cannot diagnose hidden causes.

    Two hypothetical examples

    These examples are invented to show how to use the log. They are not Vanodio products, inspected furniture, or diagnoses.

    Case 1: A seam looks different

    Suppose you notice a visible seam near the back edge of a table top. Your log might say: “Nov. 12 — seam at the back-left edge looks more noticeable than in the photo from Oct. 3; no known change in how the table is used.” Attach a wide view and a close view from similar angles. If you do not know whether the seam was present before, say so.

    That record does not show why the seam changed or whether it falls within the maker’s expectations. Ask the maker which additional details would help, whether the product has written guidance for this specific area, and what signs should prompt another contact. Do not try to close the seam or apply a product while waiting for an answer.

    Case 2: A drawer’s fit feels different

    Suppose one drawer now takes more effort to open than you remember. Identify the drawer, note when you first noticed the change, and describe the operation without forcing it. If you know of a nearby room or placement change, record it as context—not as the proven cause. A photo may show the drawer front and surrounding frame, but the maker may need information that a photo cannot show.

    Ask whether the maker needs a short video or another view, and what to do if the drawer’s operation continues to change. Do not plane an edge, add wax or oil, tighten hardware, or adjust the drawer based on a generic online tip. If the change affects safe or normal use, stop using the piece until the maker advises you.

    What to send the maker

    Share the log, the original photos, and any item or order reference you have. Keep the note brief and specific. You can adapt this message:

    I’m contacting you about [item or order reference]. I first noticed [visible change] on [date] at [component and location]. Since then, I have observed [what changed, if anything]. The function is [unchanged / changed in this way / not sure]. I have attached [photo labels] and know of [room or placement changes / no known changes]. Could you tell me what additional information would help, whether there is guidance for this exact item, and what I should do next?

    If the maker asks for another angle, image, or detail, add it to the same record. If you have questions about care, ask for instructions that match the item’s materials and finish. Keep any response with the log so later observations can be understood in context. A maker’s guidance for its own collection should not automatically be applied to another brand or finish. For example, Neptune’s timber care guide is written for Neptune timber furniture and its named finishes; it is not a universal care standard.

    Questions readers often ask

    Does a gap mean the furniture is defective?

    Not by itself. A visible gap is an observation, not a diagnosis. The maker may need the exact part, construction details, timing, photos, and information about whether the furniture still functions as expected. Ask about the specific item rather than relying on a universal tolerance that this guide cannot establish.

    Should I adjust the piece before I contact the maker?

    No. Do not alter, force, or apply a treatment to the affected area just to see whether it changes. First document the condition and follow the maker’s instructions for that exact item. If stability or function appears compromised, stop using the piece while you ask for guidance.

    Does noticing a change in a particular season prove the cause?

    No. Seasonal timing can be useful context because wood responds to moisture conditions, but timing alone does not identify what happened to one piece. Record when you noticed the change and any room or placement changes you know about, then leave the cause open for the maker to assess.

    Make the next conversation easier

    A dated record turns “something looks different” into a useful question: which part changed, when you noticed it, what evidence you have, and whether function changed. Keep the notes with the item information and ask the maker for guidance specific to that piece. If you are considering furniture, ask how the maker describes its materials and care instructions before you decide; do not treat a broad material label as a substitute for component-level information.
  • Solid Wood vs Veneer Furniture: Read the Construction Before You Choose

    Solid Wood vs Veneer Furniture: Read the Construction Before You Choose

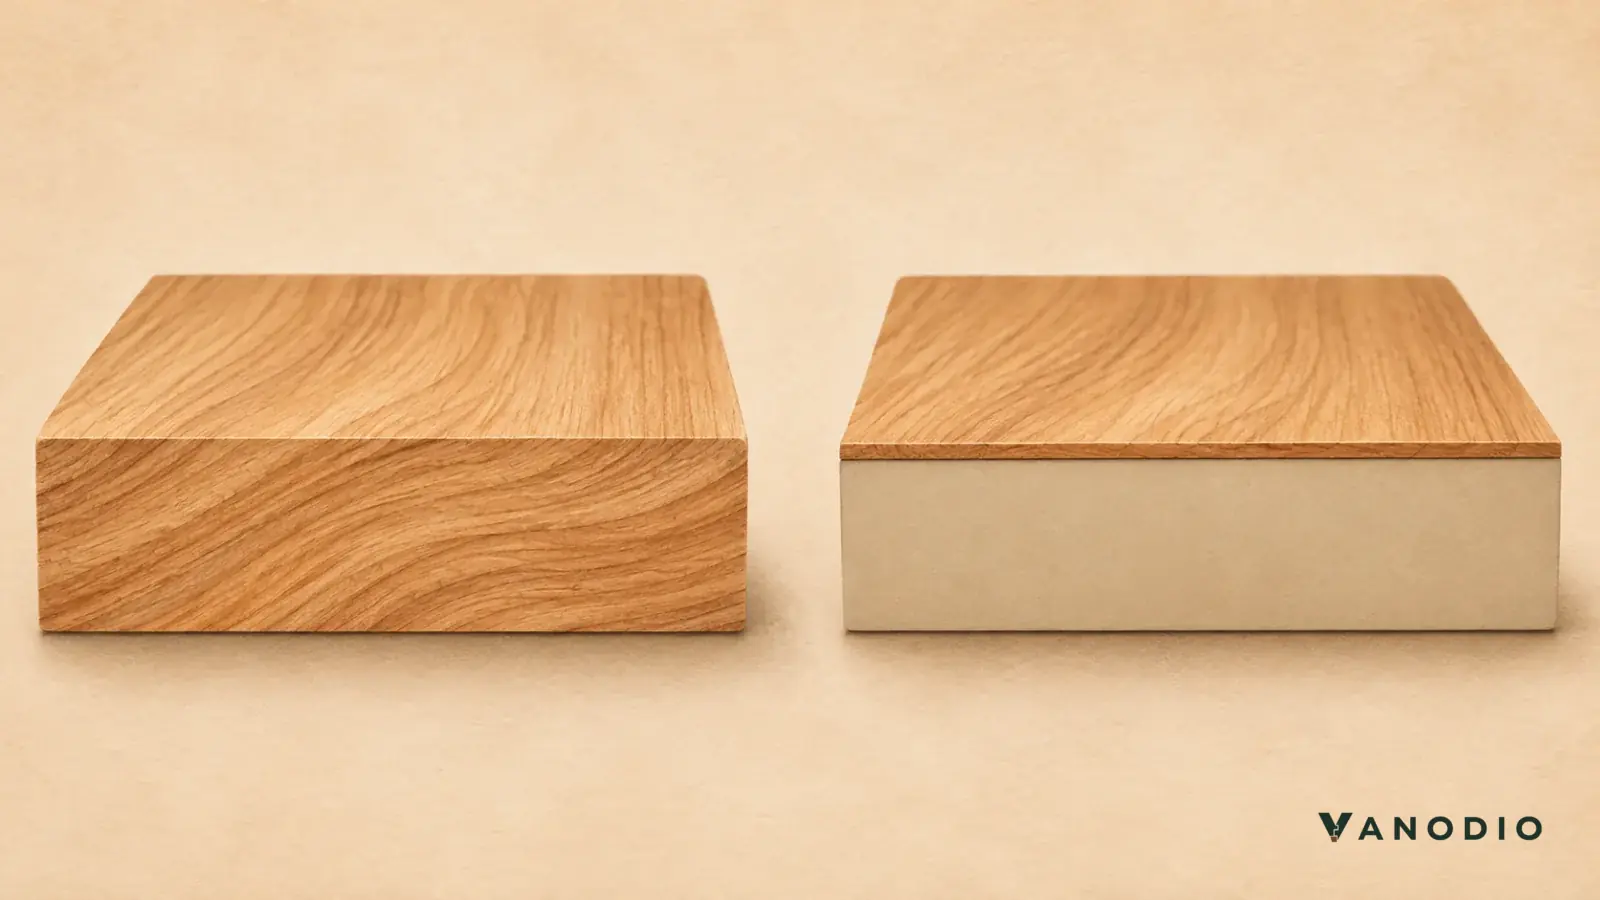
    “Solid wood” and “veneer” describe construction details, not a verdict on an entire piece of furniture. Read the specification one part at a time: identify the material at the visible face, the panel or core behind it, the edges, the frame and the finish. A wood veneer is a real-wood facing bonded to a substrate; that substrate may be MDF, particleboard or plywood. The facing and the supporting panel are different parts of the description. Oakwood Veneer’s glossary defines veneer and substrate terms.

    Neither label tells you everything about the piece’s construction or how it will suit your home. A clear component list lets you compare what is actually specified and ask focused questions about the rest.

    Conceptual comparison, not to scale; neither sample depicts a Vanodio product, and the panel substrate is not specified.

    Start with the layers, then name the component

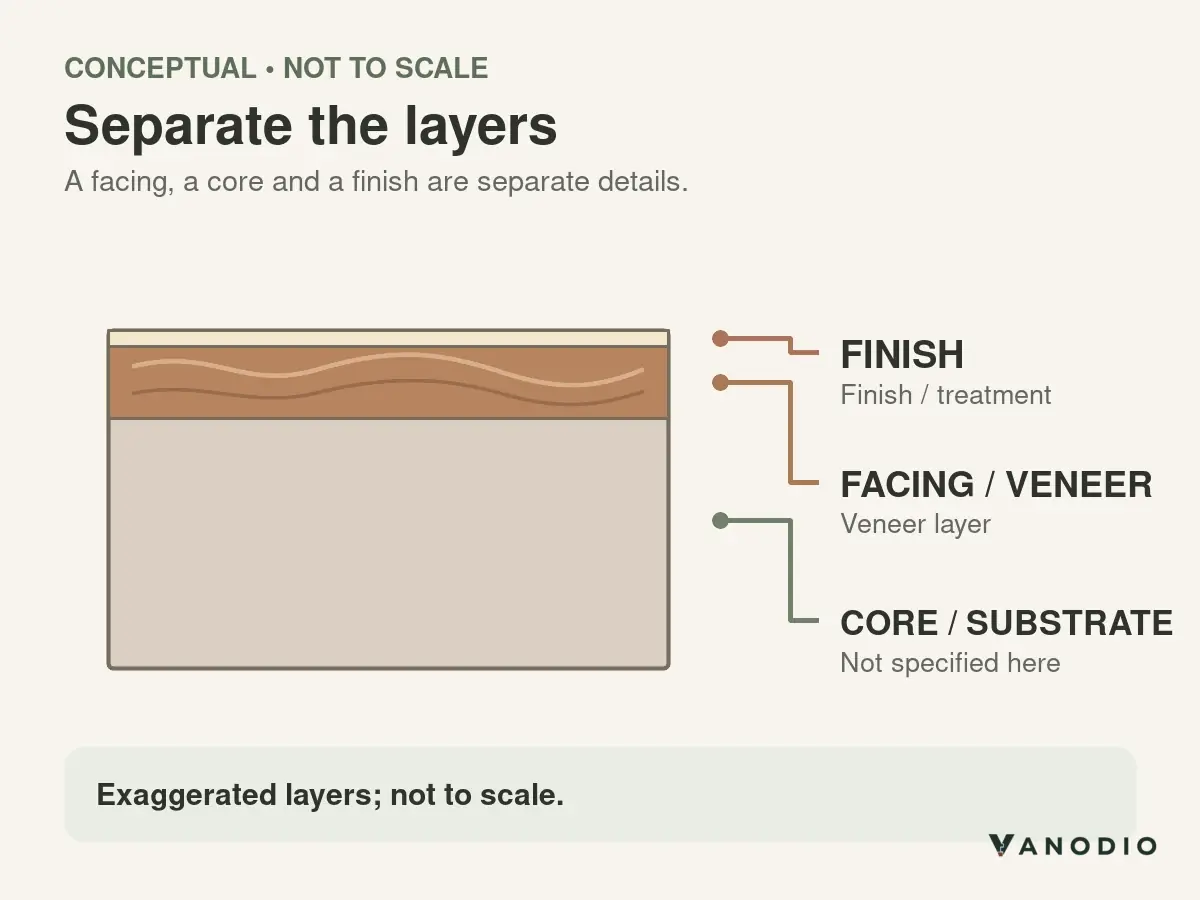
    For this guide, a solid-wood component means a part made from solid lumber rather than a veneer-faced panel. Treat that as a practical distinction for reading a listing, not a legal definition. A veneer panel has at least two details worth separating:

    • Facing: the thin wood surface you see. Ask which species is used if the listing names one.
    • Core or substrate: the panel material supporting the facing. Ask what it is; “wood veneer” does not answer this by itself.
    • Finish: the coating or treatment applied to a surface. It is a separate specification from both the facing and the core.

    The word “wood” on a product page may describe one visible area, a veneer face, or a selected set of parts. It does not automatically describe every panel, edge, drawer or leg. A furniture maker’s construction overview, for example, names solid hardwood drawer parts and veneer panels for case backs in the same overview. That is a reminder to read each component separately, not a ranking of either construction or a description of a Vanodio product. See Copeland Furniture’s published component overview.

    A conceptual cross-section labels finish, veneer facing, and a generic core or substrate; the Vanodio logo appears in the lower-right corner.
    Conceptual illustration, not to scale; the substrate is generic and is not identified as MDF or another panel material.

    Build a component map

    Begin with the parts the listing actually names. Use “not stated” when a detail is missing; do not fill a gap with an assumption based on the product photo or overall label.

    Part to check What the description may tell you What to ask when it is unclear
    Top or main panel Solid wood, wood veneer, or another named surface construction Is the panel solid lumber throughout, or a wood facing over a core? If it is veneer, what are the facing species and core material?
    Edge or band A solid-wood edge, an applied strip, a wrapped facing, or no detail Is the edge the same material as the face? How is it finished?
    Legs and frame A stated wood species or a general material label Which parts are solid wood, and which use another construction? How are the parts joined?
    Drawer fronts, sides and bottoms Sometimes described separately, sometimes grouped as “drawers” Are the front, sides and bottom made from the same material? Which details are specified?
    Back, shelves and interior panels May be omitted from a short headline What is each panel made from, and does the same description apply to every shelf or back?
    Finish and care A finish name or a link to instructions may be provided What care instructions apply to this exact surface and finish?

    This is not a grading scale. A clear specification helps you understand what you are buying; it does not by itself prove better joinery, longer service life or higher value. The material name, how parts are assembled and how surfaces are finished are separate questions.

    Keep material, joinery and finish separate

    A solid-wood part still needs a design that accommodates the way wood responds to its environment. Purdue Extension explains that wood takes on moisture in humid air and releases it in dry air, which can make it swell or shrink; finishes can slow that exchange but generally do not stop it. The useful takeaway is to ask how the maker designs and cares for the specific piece—not to conclude that solid wood is unsuitable or that veneer is immune to change. Purdue Extension’s furniture reference explains wood movement.

    Joinery is another line in the specification. A wood species or veneer label does not tell you how a rail connects to a leg, how a panel is supported or whether a drawer uses a particular joint. If construction details matter to your decision, ask the maker to identify the joinery or provide a component description. Do not infer it from the surface grain.

    Finish also deserves its own question. A photo can show color and visible grain, but it may not tell you what finish is present or what cleaning instructions apply. Ask for the care instructions for the exact item and finish. This guide does not recommend a cleaner, repair method or universal care routine.

    What photos can—and cannot—tell you

    A close view may help you see a grain pattern, a seam or an exposed edge. It cannot reliably identify a hidden core just because the front surface looks like a particular wood. That is a practical limit of what an ordinary product photo shows, not a test result.

    Use photos to decide what to ask for next: a view of the underside, a clearly described edge, or a written specification for the panel. Then ask the seller or maker to confirm the construction in writing. If no answer is available, keep the field open rather than treating appearance as proof. There is no need to sand, scratch or damage a finished surface to make this comparison.

    Two hypothetical listings, read part by part

    These examples are invented for the worksheet. They are not Vanodio products, real listings, inspected samples or evidence about a particular maker.

    Hypothetical listing A: “Solid walnut top; walnut veneer cabinet.”
    This wording names a solid-wood top and a veneer-facing cabinet, but it leaves several details open. Does “top” include its edge? What core is under the cabinet veneer? Are the legs, shelves, drawer fronts and back covered by either phrase? What finish instructions apply? The description is a starting point for questions, not a complete component schedule.

    Hypothetical listing B: “Walnut veneer over engineered wood.”
    This names a veneer face and a broad core category, but “engineered wood” does not tell the buyer which panel material is used. It also does not say which parts receive the veneer, how the edges are finished, or what the frame and drawer components are made from. Ask for those specifics before comparing the listing with another piece.

    Neither example is automatically better. The gaps matter because they keep you from knowing exactly which components the description covers.

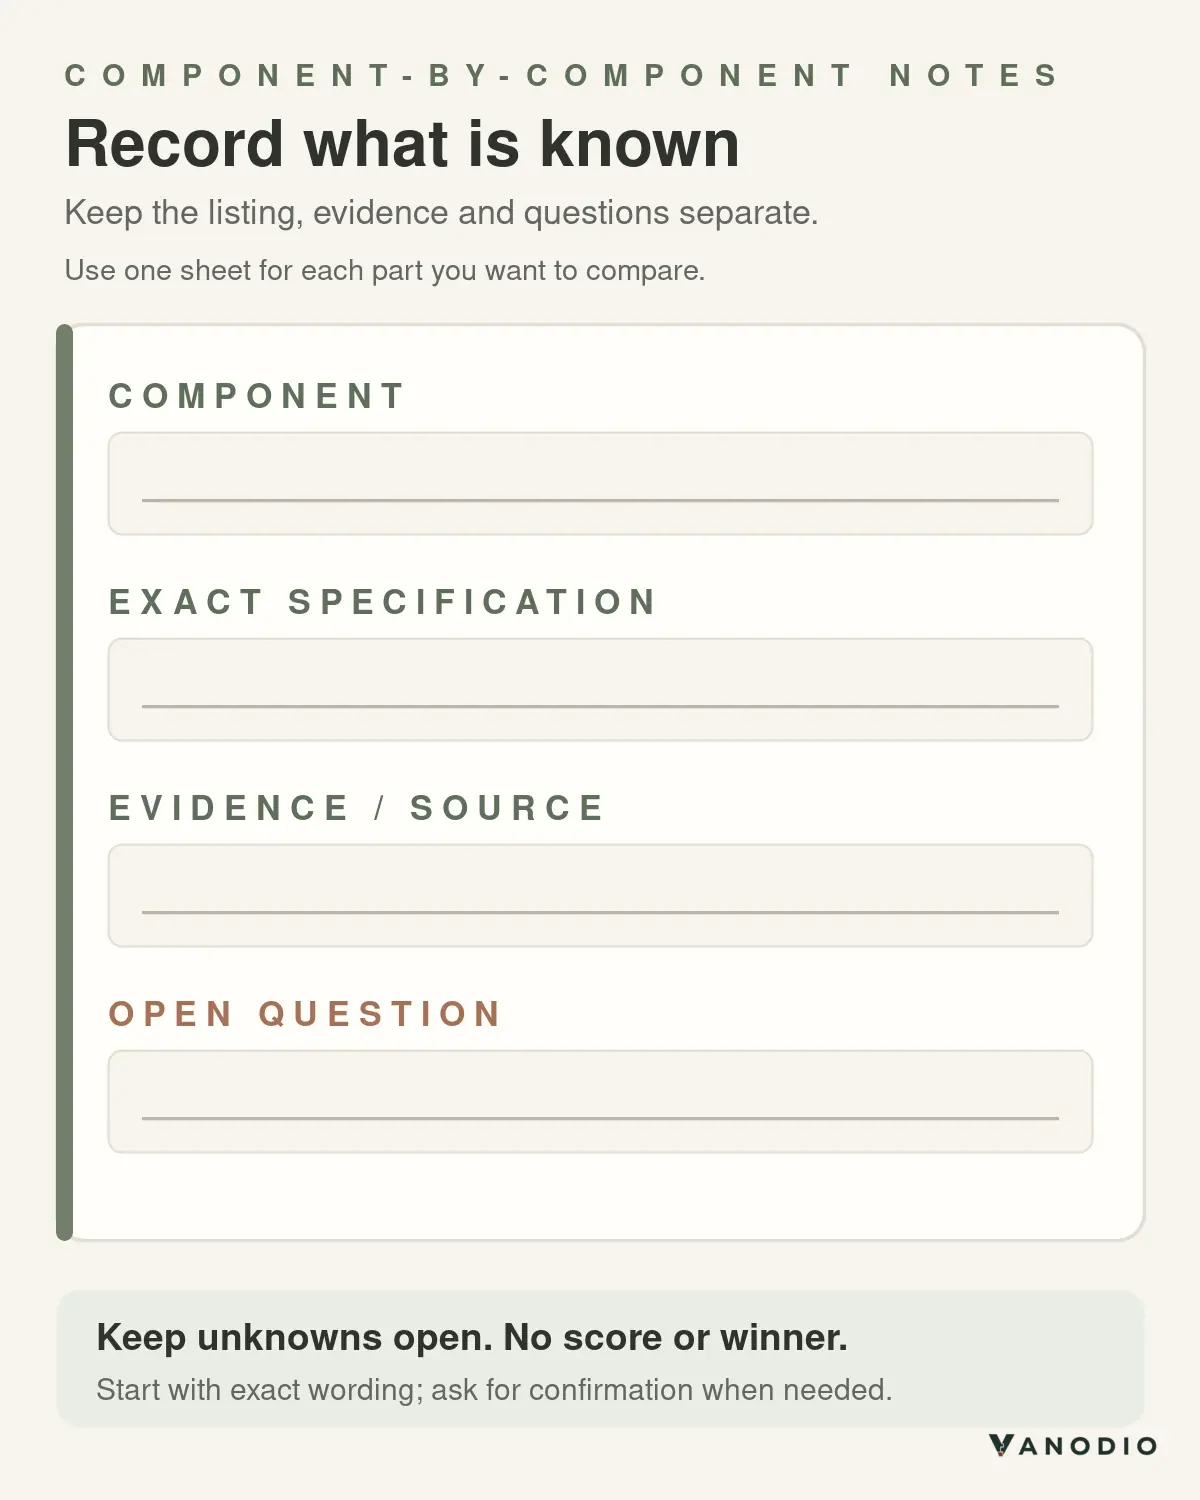
    A blank worksheet provides fields for component, exact specification, evidence or source, and open question; the Vanodio logo appears in the lower-right corner.
    Illustrative worksheet, not a scale drawing; record exact wording and evidence, and leave unknowns open without scoring a winner.

    Fill in a component-by-component worksheet

    Copy this table when you are comparing two listings. Enter the exact wording first; then separate facts the seller confirms from questions still waiting for an answer.

    Component Exact listing wording Confirmed construction or finish Evidence or source of confirmation Open question
    Top / main panel __________________ __________________ __________________ __________________
    Edge / band __________________ __________________ __________________ __________________
    Legs / frame __________________ __________________ __________________ __________________
    Drawer parts __________________ __________________ __________________ __________________
    Back / shelves / interior panels __________________ __________________ __________________ __________________
    Finish / care instructions __________________ __________________ __________________ __________________

    Before you decide, review the unfinished rows and ask:

    1. Which parts are solid wood, and which have a wood veneer or another surface?
    2. For each veneered panel, what species is the facing and what material is the core?
    3. Are the edges, legs, drawer parts, backs and shelves included in the same description, or specified separately?
    4. What finish is used, and where are the care instructions for this exact item?
    5. Which joinery or assembly details can the maker confirm if they matter to your use?

    If a seller answers only with another broad label, ask them to point to the component it describes. Record “not stated” until you have a specific answer.

    Choose from verified details, not a material-name contest

    If a particular species or solid construction matters to you, ask which component has it and how that part is built. If you are considering veneer, ask what the visible facing covers and how the rest of the piece is specified. Then compare those details with your priorities for appearance, intended use and care.

    There is no universal winner in the words “solid wood” or “veneer.” Those terms alone do not establish price, durability, repairability, environmental impact, certification or the quality of a finished piece. Use the worksheet to identify what is known, ask about what is missing and make the choice only after you have enough information about the actual item.

  • Coffee Table vs Ottoman: Choose for the Way You Use Your Living Room

    Coffee Table vs Ottoman: Choose for the Way You Use Your Living Room

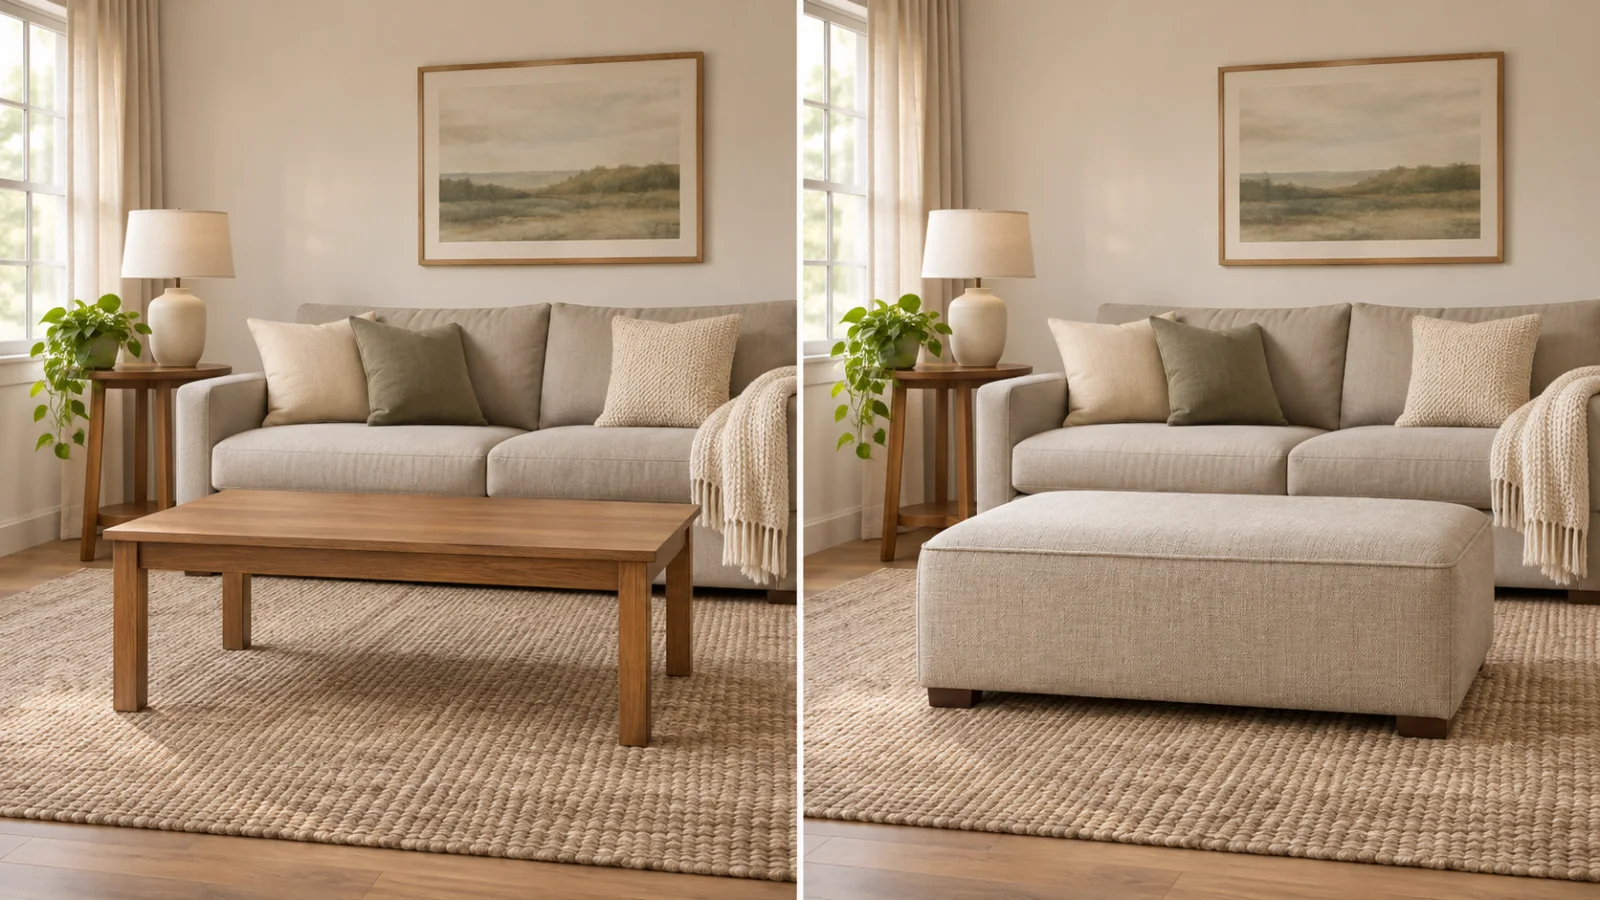
    The better choice depends on what your household does around the seating area most often. A coffee table is usually the more direct choice when you need a firm place for books, game pieces or other everyday items. An ottoman may suit a feet-up routine, and some designs add storage or other uses. Check the instructions for the exact piece before relying on any secondary use.

    If both jobs matter, decide which one needs to work every day. A tray can give an ottoman a more defined surface, but it does not turn upholstered furniture into a hard tabletop. The goal is a setup that fits your routine, not a universal winner.

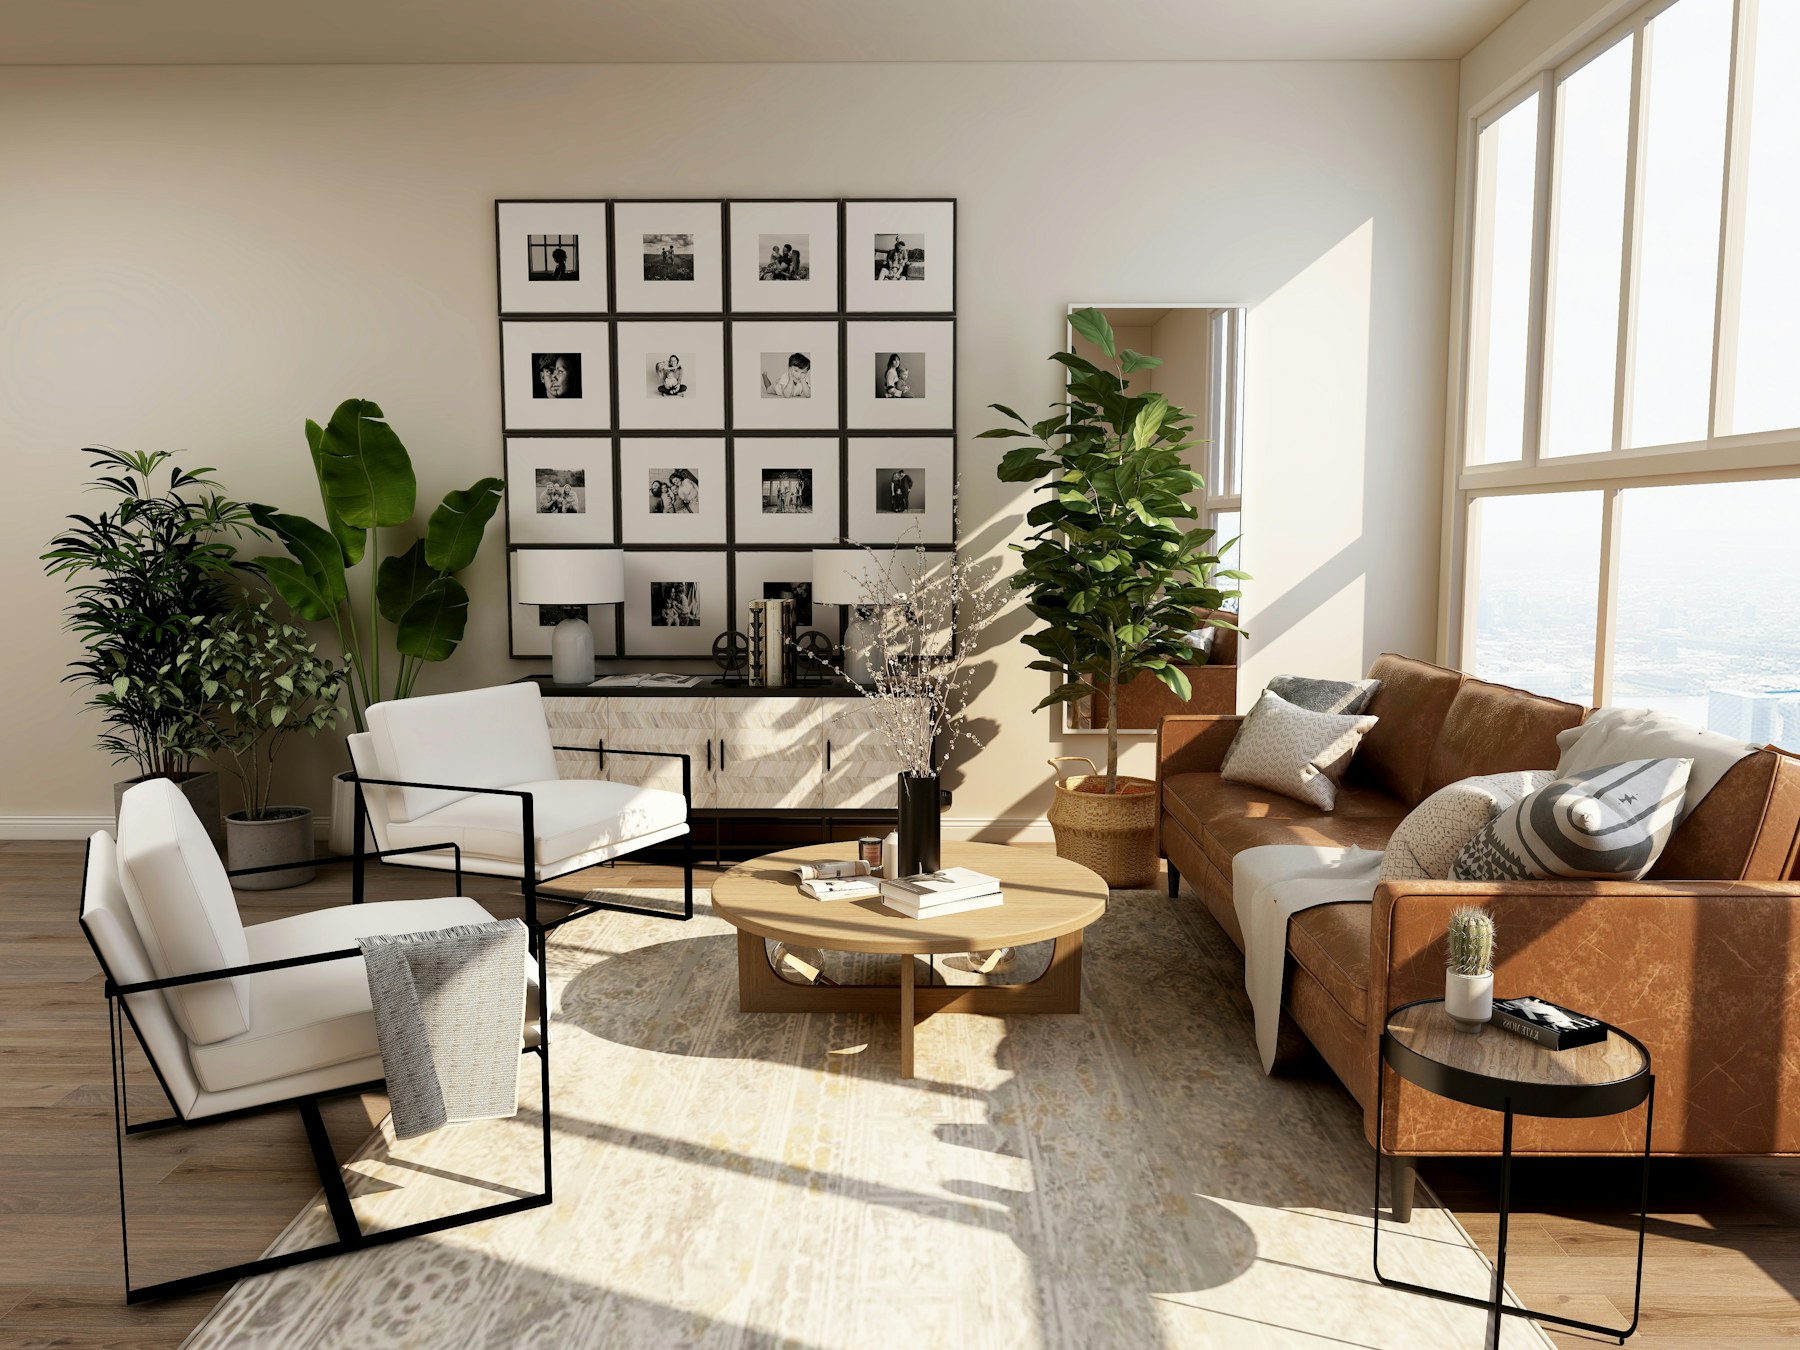
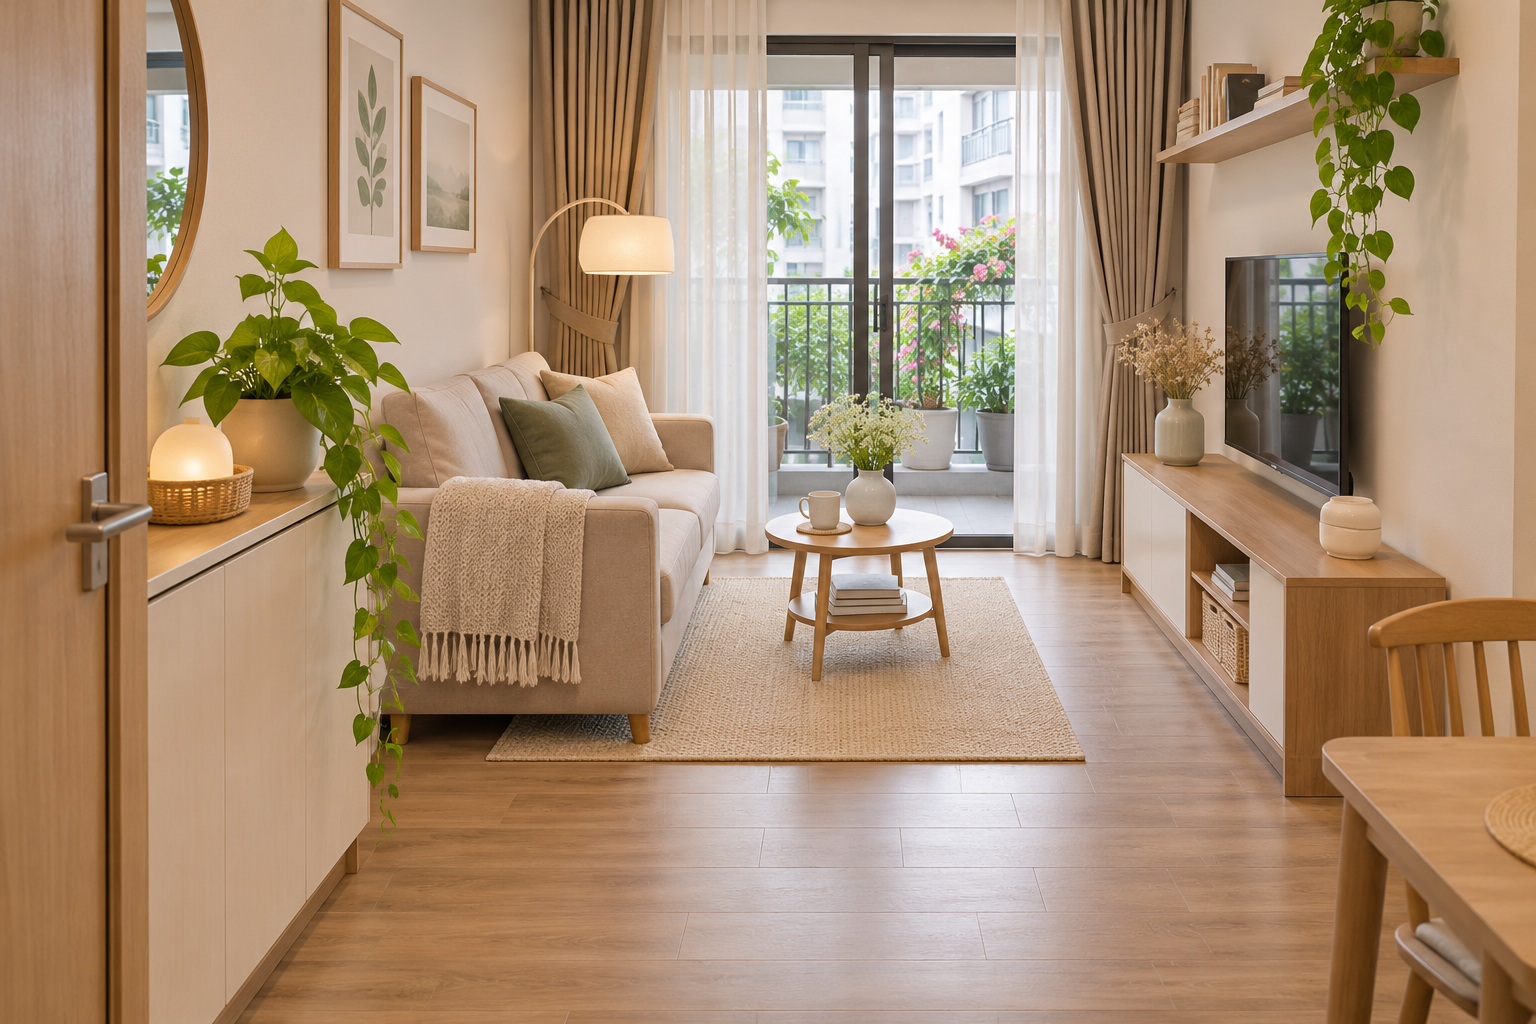
    Illustrative room concepts; neither scene depicts a confirmed Vanodio product.

    The main difference is the job each surface does

    A coffee table centers a seating area around a firm top. An ottoman has an upholstered or cushioned top and may be designed for foot support. Extra functions such as storage or occasional seating depend on the specific model. A U.S. comparison guide from Koala describes the same broad trade-off between a firm tabletop and an ottoman’s comfort and design-dependent uses; treat it as category guidance, not a test of any individual product. Read Koala’s comparison.

    What you need Coffee table Ottoman What to verify
    A firm place for books, game pieces or small items Often the simpler fit because the top is designed as a tabletop. Upholstery may be soft or uneven; a tray can add a defined surface. Check the exact top, tray support and maker’s instructions.
    A place to rest your feet A tabletop does not provide the same cushioned footrest function. A footrest-style design may suit this use. Confirm the maker’s intended uses for the specific piece.
    Occasional seating Do not treat a tabletop as a seat. Some ottomans are designed for sitting; others may not be. Use it as a seat only when the manufacturer explicitly permits that use.
    Hidden storage Some tables include a shelf or drawers; others do not. Some ottomans have a storage compartment; others do not. Check the listing and how the storage opens before deciding it meets your need.
    Cleanup after daily use Care depends on the table’s finish and material. Care depends on the upholstery and any removable parts. Follow the instructions for the exact item. Do not assume one cleaning method fits all.

    When a coffee table makes more sense

    Start with a coffee table if the center of the seating area regularly needs to hold items on a firm surface. That may include a board game, books, a notebook or refreshments. The point is not that every table handles every task; the specific top, size and care instructions still matter.

    A table may also be a better match when you want one clearly defined place for things people share. Before choosing a model, check whether it has only a top, an open shelf or enclosed storage. Do not assume a storage feature from the product category or from a room photograph.

    The trade-off is that a hard tabletop does not replace a cushioned footrest. If feet-up comfort is also part of the routine, decide whether another piece belongs in the room or whether an ottoman is the more useful primary choice.

    When an ottoman makes more sense

    An ottoman may be a better starting point when the seating area is mostly used for relaxing and the household wants a cushioned place to rest feet. Confirm that the individual design is intended for that use. If you also expect people to sit on it, check the manufacturer’s permitted uses rather than inferring that from its shape or upholstery.

    Storage is another model-specific feature. If you need a place for blankets or other items, verify that the exact ottoman has a compartment and that you can open and reach it in the intended position. “Ottoman” by itself does not tell you whether storage is included.

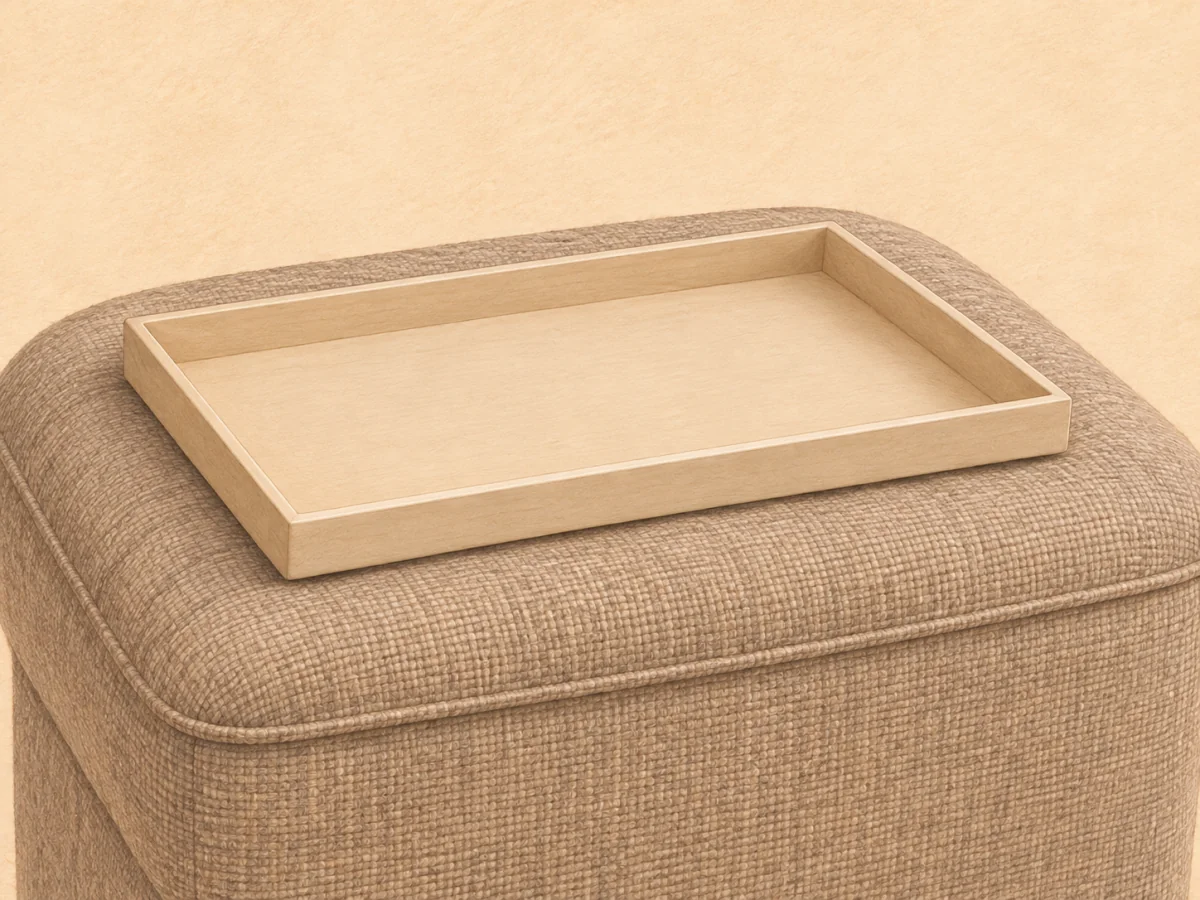
    The main compromise is the work surface. Upholstery is not the same as a firm tabletop. A tray can gather a book, remote or other small items in one place, but it may shift or sit unevenly depending on the tray and upholstered top. Check that the tray’s base and the actual ottoman surface are flat enough for it to sit as intended, and follow the product instructions. A tray is not proof that a drink cannot spill or that liquid will stay away from the fabric.

    If surface stability is important, keep a separate firm surface available or choose a table as the primary piece. Do not rely on an ottoman-and-tray setup to perform a task the specific products are not designed to handle.

    An empty shallow tray rests on the fabric top of an upholstered ottoman.
    Illustration only; check tray support and the manufacturer's instructions for the specific items.

    Two evening routines, two different starting points

    These are hypothetical examples to show how the worksheet works. They are not Vanodio customer stories, product tests or evidence about a particular item.

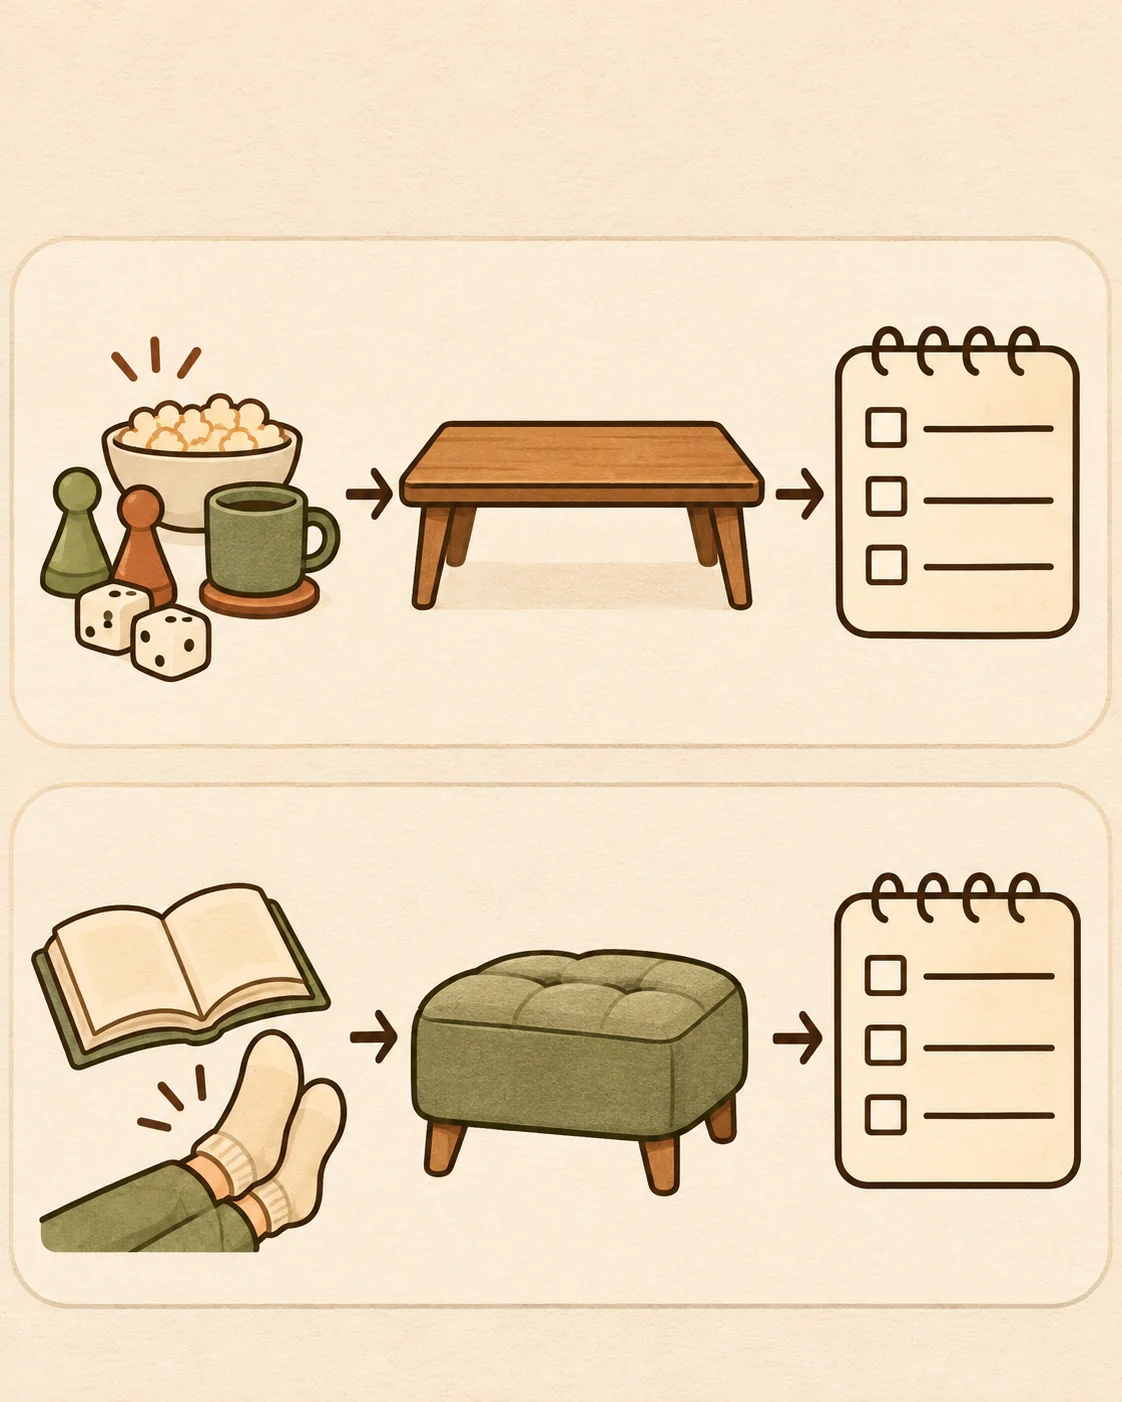
    Routine A: games and shared items. The household often plays a board game and leaves a book or remote within reach. A coffee table is the clearer first option because the routine repeatedly asks for a firm shared surface. Before deciding, check that the selected table’s actual footprint works in the room and review its care instructions.

    Routine B: reading and putting feet up. The household mostly reads or watches a show and rarely needs a central surface. An ottoman designed for foot support may fit that routine better. If it will also hold items, test the intended tray on the actual kind of support surface and verify the maker’s guidance. If occasional seating or storage matters, verify those uses separately.

    The point is to choose around the activity that recurs, then check the real product and room. A list of possible features is less useful than knowing which function would be missed most often.

    A fill-in worksheet for choosing

    Use this before comparing product pages. It is a planning aid, not a scored test or a substitute for product instructions.

    1. Main activity: What do people most often do around this seating area?
    2. Items that need support: What needs to sit on a firm, shared surface?
    3. Feet-up use: Would a cushioned footrest be used regularly? Which specific designs are intended for it?
    4. Seating: Is occasional seating part of the plan? What does the manufacturer permit for the exact item?
    5. Storage: What would be stored, and can the compartment be reached in the planned position?
    6. Care: What instructions apply to the actual tabletop finish or upholstery?
    7. Footprint: Mark the candidate piece’s footprint on the floor with paper or tape. Sit, stand and walk the routes you use most. No single spacing number can account for every room and routine.
    8. Open questions: Which dimensions, included parts, uses or care details still need confirmation?
    Fill this in Your notes
    Activity that happens most often ______________________________
    Items that need a firm surface ______________________________
    Footrest, seating or storage uses to verify ______________________________
    Care instructions to review ______________________________
    Footprint and routes tested ______________________________
    Questions to ask before ordering ______________________________
    An icon-led diagram maps games and shared items to a coffee table, and reading with feet up to an ottoman; both routes end with an empty checklist.
    Illustration: Planning aid only; use the routines to identify questions, then confirm the exact item's permitted uses and care.

    If your open questions are mostly about whether the piece fits the room, use Vanodio’s existing guide to plan the table footprint in your room. That guide covers layout and circulation; this comparison is about choosing between a hard tabletop and an upholstered piece.

    Questions to confirm before you choose

    • What uses does the manufacturer permit for this specific item?
    • Does the item have storage, a tray or other parts, and are they included?
    • If a tray will be used, is its base and the actual support surface flat enough for it to sit as intended?
    • What care instructions apply to the exact finish or upholstery?
    • What are the finished dimensions and footprint, and can you check them against your seating area?

    Choose the piece that supports the activity you repeat most often, then confirm its uses and care in the product information. If neither option covers the routine without an assumption, keep the question open until the seller or manufacturer confirms the missing detail.

  • Entryway Console Table: Measure for Fit and Clear Walkways

    Entryway Console Table: Measure for Fit and Clear Walkways

    Bàn console ở lối vào có thể tạo chỗ để những món đồ dùng hằng ngày, nhưng một chiếc bàn quá sâu hoặc đặt sai vị trí sẽ khiến việc ra vào khó khăn hơn. Hãy đo cửa, lối đi và nhu cầu lưu trữ trước khi quyết định bàn console sẽ nằm ở đâu.

    Đo lối di chuyển qua khu vực cửa vào

    Ghi lại chiều rộng và chiều dài của khu vực cửa vào, sau đó đánh dấu hướng mở cửa, cửa tủ, cầu thang và lối thường dùng để mang túi hoặc vật dụng lớn. Chú ý những vị trí mọi người thường dừng lại để thay giày hoặc chờ mở cửa.

    Dùng giấy hoặc băng keo đánh dấu diện tích bàn trên sàn rồi đi thử qua, nếu có thể hãy thử cùng người khác. Kiểm tra khi cửa mở hết cỡ và khi bàn ở đúng vị trí dự kiến. Đừng chỉ dựa vào kích thước bức tường.

    Chọn độ sâu và chỗ chứa theo nhu cầu

    Liệt kê những món bạn muốn để gần cửa: chìa khóa, thư từ, đèn, túi xách hay giày. Danh sách này giúp bạn quyết định cần mặt bàn hẹp, ngăn kéo hay kệ thấp. Kiểm tra ngăn kéo và cánh tủ có mở đè lên lối đi không.

    Để những món hay dùng trong tầm tay và giữ đủ mặt bàn cho thói quen ra vào của gia đình. Nếu định đặt giày hoặc giỏ phía dưới, hãy đưa chúng vào bản phác thảo ngay từ đầu.

    Lưu ý an toàn khi kê và cố định

    Một món đồ cao hoặc hẹp có thể cần dây chống lật, tùy cấu tạo và vị trí đặt. Làm theo hướng dẫn của nhà sản xuất và dùng phụ kiện phù hợp với loại tường. Nếu chưa rõ vật liệu tường hay cách lắp, hãy hỏi thợ có chuyên môn trước khi đặt vật nặng lên bàn.

    Bảo vệ cửa và tường cạnh bàn khỏi tay nắm hoặc góc nhọn. Trước khi sắp xếp giao hàng, kiểm tra món đồ có thể đi qua cửa tòa nhà, hành lang và cầu thang hay không.

    Phối bàn console với không gian

    Chọn kiểu dáng và bề mặt phù hợp với ánh sáng, sàn nhà và nội thất gần đó. Nghĩ đến cách vệ sinh và việc bàn có nhận nắng trực tiếp hoặc thường xuyên bị va chạm không. Hỏi thông tin về bề mặt và cách chăm sóc đã được xác nhận của đúng món đồ.

    Danh sách kiểm tra bàn console lối vào

    • Đã đo toàn bộ lối vận chuyển và hướng mở từng cánh cửa.
    • Diện tích bàn đã đánh dấu vẫn chừa lối đi thoải mái.
    • Ngăn kéo, cánh cửa, giày và giỏ không cản lối ra vào.
    • Đã xác nhận việc cố định tường và phụ kiện nếu cần.
    • Món đồ có thể vận chuyển qua lối giao hàng của tòa nhà.

    Câu hỏi thường gặp

    Bàn console ở lối vào nên sâu bao nhiêu?

    Chọn độ sâu phù hợp với lối đi đã đo và những món bạn muốn lưu trữ. Không có một kích thước duy nhất phù hợp cho mọi lối vào; hãy thử đúng diện tích bàn trên sàn trước khi đặt.

    Có thể đặt bàn console sau cánh cửa đang mở không?

    Hãy kiểm tra toàn bộ cung mở, tay nắm và khoảng trống bằng hình đánh dấu trên sàn. Chừa đủ chỗ để cửa hoạt động mà không va vào bàn hoặc các món đặt trên bàn.

  • How to Choose a Coffee Table for a Small Living Room

    How to Choose a Coffee Table for a Small Living Room

    Bàn trà có thể giúp phòng khách tiện dụng hơn mà không trở thành vật cản. Với không gian nhỏ, hãy bắt đầu từ chỗ ngồi, lối đi và hoạt động hằng ngày trong phòng. Chỉ chọn bàn sau khi đã hình dung cách mọi người đi lại giữa sofa, cửa và các món nội thất khác.

    Vẽ khu vực chỗ ngồi và lối đi

    Phác vị trí sofa, ghế, cửa, cửa sổ và các lối đi chính. Ghi lại xem mọi người có cần đi qua khoảng giữa sofa và bếp, ban công hay hành lang không. Bàn nên nằm trong tầm với thoải mái nhưng vẫn chừa được lối đi thông thoáng.

    Dùng băng keo hoặc giấy đánh dấu diện tích sofa và bàn trên sàn. Chừa khoảng để đầu gối và để mọi người đứng lên khỏi sofa. Đi thử qua khu vực vào lúc đông người nhất trong ngày rồi mới chốt hình dáng hay kích thước.

    Chọn hình dáng theo căn phòng

    Mặt bàn chữ nhật có thể tạo đường nét tương ứng với sofa dài; đường viền tròn hoặc oval có thể hợp với phương án cần đi vòng qua hai đầu bàn. Đây chỉ là gợi ý ban đầu: hình dáng vẫn cần phù hợp với căn phòng và cách bạn sử dụng.

    Hãy cân nhắc góc bàn, trẻ nhỏ hoặc thú cưng và tần suất mọi người đi lại quanh bàn. Kiểm tra bàn có va vào ghế ngả, chân ghế hay cửa khi các món đó đang được sử dụng không.

    Xác định bàn cần chứa những gì

    Ghi lại những món thường để ở phòng khách như điều khiển, sách, khay hoặc trò chơi. Nếu cần chỗ cất kín, hãy xem ngăn kéo hay cánh cửa mở theo hướng nào và có cản chỗ ngồi không. Nếu chỉ dùng mặt bàn vào một số dịp, một chiếc bàn nhỏ hoặc thoáng mắt có thể đã đủ.

    Đừng mặc định kệ mở sẽ luôn gọn hoặc ngăn chứa sẽ dễ lấy. Hãy nghĩ đến việc lau dọn và di chuyển bàn khi hút bụi hoặc sắp xếp lại phòng.

    So sánh bề mặt và cách chăm sóc

    Hỏi cách vệ sinh và chăm sóc bề mặt hoàn thiện cụ thể. Cân nhắc cốc nóng, nước đổ, ánh nắng và tần suất chạm vào mặt bàn trong gia đình. Đọc hướng dẫn của đúng sản phẩm trước khi mua vì mỗi vật liệu và lớp hoàn thiện có thể có yêu cầu khác nhau.

    Kiểm tra độ vừa trước khi đặt

    • Đánh dấu vị trí mặt bàn và chân bàn trên sàn.
    • Kiểm tra đường đi giữa các chỗ ngồi và xuyên qua căn phòng.
    • Thử mở cửa, ngăn kéo, ghế ngả và tủ gần đó.
    • Xác nhận kích thước hoàn thiện, vật liệu và cách chăm sóc.
    • Hỏi cách vận chuyển món đồ qua cửa ra vào và hành lang.

    Câu hỏi thường gặp

    Phòng nhỏ lúc nào cũng nên dùng bàn trà tròn?

    Không có hình dáng nào phù hợp với mọi mặt bằng. Hãy đối chiếu kích thước thực tế, góc bàn, chỗ ngồi và lối đi trong phòng trước khi chọn.

    Bàn trà có nên có ngăn lưu trữ không?

    Chỉ nên chọn ngăn chứa nếu bạn cần đến chúng và vẫn có thể mở mà không chặn ghế hay lối đi. Khoảng trống quanh bàn đôi khi hữu ích hơn nhiều ngăn chứa.

  • Dining Table and Chair Height: How to Find a Comfortable Fit

    Dining Table and Chair Height: How to Find a Comfortable Fit

    Chọn bàn và ghế ăn cùng nhau sẽ dễ hơn khi chỉ dựa vào tên gọi hoặc hình dáng của từng món. Cảm giác vừa vặn phụ thuộc vào chiếc ghế và chiếc bàn cụ thể, cấu tạo mặt dưới, người sử dụng và khoảng trống quanh bộ bàn ghế. Bài viết này là hướng dẫn lên phương án, không phải thông số của một sản phẩm cụ thể.

    Bắt đầu từ chiếc ghế bạn định sử dụng

    Nếu đã có ghế, hãy đo trước khi chọn bàn. Nếu mua cả bộ, hãy đối chiếu hai sản phẩm với nhau. Chiều cao mặt ghế, độ lún của đệm, góc tựa lưng và tay vịn đều có thể ảnh hưởng đến việc kéo ghế vào bàn và cảm giác khi ngồi ăn.

    Nếu có thể, hãy thử ngồi đúng mẫu ghế bên cạnh một chiếc bàn có cấu tạo tương tự. Kiểm tra tư thế, vị trí chân và việc đứng lên ngồi xuống. Ảnh chụp hoặc tên gọi chung không thể cho biết mọi người sẽ cảm nhận món đồ ra sao.

    Kiểm tra khoảng trống dưới mặt bàn

    Đừng chỉ đo từ sàn đến mặt trên của bàn. Thanh giằng hoặc yếm bàn ở phía dưới có thể làm giảm chỗ để đầu gối. Tay vịn cũng có thể khiến ghế không đẩy sát vào bàn được, dù mặt ghế vẫn vừa lọt.

    Hãy hỏi kích thước hoàn thiện của đúng mẫu bàn và ghế, gồm cả cấu tạo bên dưới và điểm cao nhất của tay vịn. Chừa khoảng trống để kéo ghế ra mà không va vào tường, tủ hoặc ghế bên cạnh.

    Lên bố cục theo số người sử dụng

    Tách số người dùng hằng ngày khỏi số khách chỉ thỉnh thoảng mới ngồi cùng. Phác vị trí từng ghế quanh bàn và đánh dấu cửa, lối đi cùng tủ mở vào khu vực đó. Kiểm tra phương án khi có người ngồi cũng như khi ghế được đẩy vào.

    Nếu cần bố trí linh hoạt, hãy so sánh cấu hình sử dụng thường ngày với các phương án bàn mở rộng. Kiểm tra kích thước và số chỗ ngồi ở từng cấu hình thay vì mặc định bàn mở rộng sẽ phù hợp với mọi căn phòng.

    Thử bố cục trước khi đặt

    Dùng băng keo giấy hoặc giấy để đánh dấu diện tích mặt bàn trên sàn. Đánh dấu thêm vị trí ghế khi kéo ra, rồi đi thử quanh phòng và mở các cửa, ngăn kéo, tủ ở gần đó. Cách thử đơn giản này có thể phát hiện va chạm khó nhận ra qua ảnh sản phẩm.

    Nếu đặt đóng nội thất, hãy xem bản vẽ có kích thước hoàn thiện và cấu tạo mặt dưới. Trước khi sản xuất, đề nghị bên bán xác nhận bằng văn bản rằng bàn và ghế đã chọn có thể sử dụng cùng nhau.

    Danh sách kiểm tra bộ bàn ghế ăn

    • Đã có kích thước hoàn thiện của đúng mẫu bàn và ghế.
    • Đầu gối và tay vịn không vướng phần dưới mặt bàn.
    • Kéo ghế ra vào không chặn lối đi.
    • Cửa, ngăn kéo và tủ vẫn mở được khi có người ngồi.
    • Đã kiểm tra cấu hình mở rộng với mặt bằng căn phòng.

    Câu hỏi thường gặp

    Ghế ăn nào cũng dùng được với mọi bàn ăn không?

    Không. Hãy so sánh kích thước và cấu tạo của đúng từng món, đặc biệt là chiều cao mặt ghế, yếm bàn và tay vịn. Nếu có thể, hãy thử ghế cùng bàn.

    Ghế có cần đẩy lọt hoàn toàn dưới bàn không?

    Điều đó tùy vào ghế, bàn và diện tích sử dụng. Hãy kiểm tra tư thế ngồi có thoải mái không và ghế có chắn lối đi khi đang dùng hay không.

  • How to Arrange a Small Bedroom: Bed, Storage & Lighting

    How to Arrange a Small Bedroom: Bed, Storage & Lighting

    Cách bố trí phòng ngủ nhỏ hiệu quả không bắt đầu từ việc mua thêm tủ hay đồ trang trí. Hãy đo căn phòng, xác định lối đi cần giữ và chọn món đồ lớn nhất — thường là giường — trước khi sắp xếp các món còn lại.

    Các gợi ý dưới đây là quy trình tham khảo, không thay thế bản vẽ cho một căn nhà cụ thể. Cửa, cửa sổ, ổ điện và kích thước đồ nội thất thực tế sẽ quyết định bố cục phù hợp.

    Vẽ sơ đồ phòng và ghi các điểm cố định

    Ghi chiều dài, chiều rộng phòng, vị trí cửa ra vào, cửa sổ, tủ âm tường, ổ cắm và hướng mở cửa. Đánh dấu cả những vật phải giữ lại. Một sơ đồ đơn giản trên giấy thường đủ để thử vài vị trí trước khi di chuyển đồ nặng.

    Khi đo, tính đến cánh cửa và ngăn kéo lúc mở. Một chiếc tủ vừa khít trên sơ đồ có thể gây bất tiện nếu cửa phòng hoặc cánh tủ va vào nhau.

    Đặt giường trước và giữ lối đi tự nhiên

    Chọn hướng kê giường dựa trên cửa ra vào, cửa sổ và thói quen sử dụng; không có một vị trí đúng cho mọi phòng. Hãy thử đánh dấu chân giường trên sàn để biết lối lên xuống, đường đến tủ và lối thoát ra cửa có còn thuận tiện không.

    Nếu phòng hẹp, cân nhắc kiểu giường và đầu giường có tỷ lệ gọn với mặt bằng. Đừng chỉ nhìn chiều dài và chiều rộng đệm; khung giường, tab đầu giường và phần mở ngăn kéo cũng chiếm chỗ.

    Chọn tủ theo cách lưu trữ

    Liệt kê đồ cần cất trước khi chọn tủ: quần áo treo, đồ gấp, chăn gối hay vật dụng ít dùng. Cách phân loại này giúp chọn tỷ lệ giữa khoang treo, ngăn kéo và kệ thay vì chọn một khối tủ lớn theo cảm tính.

    Kiểm tra hướng mở cánh và ngăn kéo ngay trên sơ đồ. Cửa lùa có thể hữu ích khi phía trước tủ thiếu khoảng thao tác, nhưng cần xem kết cấu tường, ray và cách sử dụng thực tế trước khi quyết định.

    Tổ chức ánh sáng theo hoạt động

    Bắt đầu từ ánh sáng chung để nhìn và di chuyển an toàn. Sau đó bổ sung đèn đọc sách hoặc đèn làm việc tại vị trí cần dùng. Đèn cạnh giường nên đặt sao cho thao tác bật tắt dễ dàng mà không phải đi qua phòng trong bóng tối.

    Rèm và cách đặt giường cũng ảnh hưởng đến ánh sáng ban ngày. Giữ cửa sổ thông thoáng khi có thể, đồng thời chọn loại rèm phù hợp với nhu cầu riêng tư và nghỉ ngơi của gia đình.

    Dùng màu sắc và đồ trang trí có chủ đích

    Chọn một nhóm màu nền ổn định cho tường, rèm và đồ lớn, rồi thêm điểm nhấn qua chăn, gối hoặc tranh. Gương có thể giúp phản chiếu ánh sáng trong một số vị trí, nhưng cần thử góc đặt để tránh phản chiếu trực tiếp nguồn sáng gây chói.

    Ưu tiên món đồ có công năng rõ ràng và giữ bề mặt sử dụng thường xuyên thông thoáng. Trong phòng nhỏ, khoảng trống cũng là một phần của bố cục: không cần lấp đầy mọi góc bằng kệ hoặc bàn phụ.

    Checklist bố trí phòng ngủ nhỏ

    • Đã ghi vị trí cửa, cửa sổ, ổ cắm và hướng mở cánh.
    • Đã thử kích thước thực của khung giường và đường đi quanh giường.
    • Cửa tủ, ngăn kéo và cửa phòng có thể mở mà không va nhau.
    • Ánh sáng chung và đèn đọc sách phù hợp với hoạt động thường ngày.
    • Đồ trang trí không che cửa sổ hoặc làm cản lối sử dụng.

    Câu hỏi thường gặp

    Có nên kê giường sát cửa sổ không?

    Tùy hướng nắng, thông gió, rèm và cách sử dụng phòng. Hãy kiểm tra khả năng mở cửa, vệ sinh và mức sáng thực tế trước khi cố định vị trí.

    Phòng ngủ nhỏ nên dùng tủ cánh mở hay cửa lùa?

    So sánh khoảng trống phía trước tủ và thói quen lấy đồ. Cánh mở cần vùng thao tác khi mở; cửa lùa tiết kiệm phần khoảng mở đó nhưng có cấu tạo và cách bảo trì riêng.

    Xem thêm các hình ảnh không gian mang tính tham khảo tại trang Dự án. Các hình ảnh tại đó không phải bản vẽ hay thông số cho phòng ngủ cụ thể.

  • How to Choose a Dining Table for a Small Apartment

    How to Choose a Dining Table for a Small Apartment

    Cách chọn bàn ăn cho căn hộ nhỏ nên bắt đầu từ thói quen sinh hoạt và phần diện tích có thể sử dụng mỗi ngày. Một chiếc bàn vừa mắt trong ảnh vẫn có thể làm lối đi chật nếu chưa tính ghế, cửa tủ và khoảng trống khi mọi người ngồi xuống.

    Bài viết này đưa ra quy trình tham khảo để bạn tự đo và so sánh các phương án. Hãy đối chiếu với mặt bằng thực tế; kích thước phù hợp còn tùy kiểu ghế, cửa mở và cách gia đình sử dụng căn phòng.

    Bắt đầu từ số người và thói quen dùng bàn

    Ghi lại số người dùng bàn thường xuyên, số khách thường có và những việc khác diễn ra tại đây như làm việc, học bài hay chuẩn bị thức ăn. Nhu cầu hằng ngày nên quyết định kích thước trước; những dịp đông người có thể được giải quyết bằng ghế phụ hoặc bàn mở rộng nếu căn hộ có chỗ cất.

    Cũng nên xem bàn đặt cạnh bếp, trong phòng ăn riêng hay nối với phòng khách. Vị trí này ảnh hưởng đến hướng kéo ghế, đường đi từ bếp và tầm nhìn giữa các khu vực.

    Đo cả mặt bàn, ghế và lối đi

    Đo chiều dài, chiều rộng khu vực dự định đặt bàn, đồng thời đánh dấu cửa ra vào, tủ bếp, lối ra ban công và những cánh cửa cần mở. Đừng chỉ đo mặt bàn: hãy tính cả phần ghế kéo ra và khoảng để người ngồi đứng lên mà không chắn đường đi.

    Bạn có thể dùng băng giấy đánh dấu kích thước mặt bàn trên sàn, đặt ghế hiện có quanh đó rồi thử đi lại, mở ngăn kéo và mở cửa tủ. Cách thử này giúp phát hiện điểm vướng trước khi đặt mua hoặc đóng bàn.

    Chọn dáng bàn theo mặt bằng

    Bàn chữ nhật

    Dáng chữ nhật thường dễ kê dọc theo tường hoặc cạnh đảo bếp và phù hợp với phòng dài. Hãy kiểm tra đầu bàn có chặn lối đi hay không; nếu có, cân nhắc kích thước ngắn hơn hoặc vị trí kê khác.

    Bàn tròn hoặc bầu dục

    Mặt bàn bo tròn có thể giúp lối đi quanh bàn liền mạch hơn trong một số mặt bằng, đồng thời không có góc nhọn ở đầu bàn. Tuy nhiên, đường kính bàn vẫn cần đủ cho số người và dụng cụ sử dụng; hãy thử bằng kích thước mô phỏng trước khi chọn.

    Bàn gấp hoặc mở rộng

    Kiểu bàn này hữu ích khi nhu cầu thay đổi theo dịp. Kiểm tra hướng mở cánh, chỗ cất phần mở rộng và thao tác mở có vướng tủ hay không. Nếu phải dọn nhiều đồ mỗi lần sử dụng, một mẫu cố định vừa vặn có thể thuận tiện hơn.

    Phối vật liệu và màu sắc với căn hộ

    Đặt mẫu màu cạnh sàn, tủ bếp và tường dưới ánh sáng ban ngày lẫn buổi tối. Vân gỗ, đá và bề mặt sơn có thể đổi sắc theo ánh sáng; ảnh trên màn hình chỉ nên dùng để định hướng ban đầu. Nếu căn hộ nhỏ, một bảng màu nhất quán giữa bàn, ghế và khu bếp thường giúp không gian có cảm giác gọn hơn.

    Trước khi chọn chất liệu, hỏi rõ cách vệ sinh, khả năng chịu nhiệt, xử lý vết bẩn và yêu cầu bảo dưỡng. Hãy dùng hướng dẫn chăm sóc do nhà cung cấp của món đồ thực tế đưa ra, thay vì áp dụng một cách làm chung cho mọi loại bề mặt.

    Checklist trước khi chốt bàn ăn

    • Đã ghi số người dùng thường xuyên và nhu cầu khi có khách.
    • Đã đánh dấu mặt bàn cùng vị trí ghế kéo ra trên sàn.
    • Lối đi, cửa tủ và đường từ bếp vẫn sử dụng thuận tiện.
    • Đã kiểm tra mẫu màu cạnh vật liệu có sẵn trong nhà.
    • Đã hỏi về kích thước hoàn thiện, vệ sinh, giao hàng và bảo hành của sản phẩm cụ thể.

    Câu hỏi thường gặp

    Bàn tròn có luôn tiết kiệm diện tích hơn bàn chữ nhật không?

    Không có một hình dáng phù hợp cho mọi căn hộ. Bàn tròn có thể thuận lối đi ở một số góc phòng, còn bàn chữ nhật có thể tận dụng tốt một bức tường dài. Hãy so sánh trên mặt bằng đã đo.

    Nên chọn bàn mấy chỗ ngồi?

    Bắt đầu từ số người dùng hằng ngày và kiểm tra kích thước chỗ ngồi trên mẫu bàn cụ thể. Nếu cần thêm chỗ đôi khi, cân nhắc phương án mở rộng hoặc ghế phụ thay vì chọn một chiếc bàn quá lớn cho mọi ngày.

    Bạn có thể xem các phương án không gian tại trang Dự án như hình minh họa, rồi gửi mặt bằng hoặc nhu cầu qua trang Liên hệ để trao đổi hướng bố trí.

  • How to Arrange a Small Living Room: 8 Practical Steps

    Cách bố trí phòng khách nhỏ phù hợp bắt đầu từ việc gia đình dùng căn phòng ra sao và lối đi nào cần giữ. Sau đó, ghi lại mặt bằng, các cửa và đồ cần giữ, rồi thử vị trí món chính trước khi quyết định chọn sofa, bàn trà hay tủ.

    Bài viết dưới đây là quy trình lập kế hoạch, không phải bản thiết kế cho một căn nhà cụ thể. Hãy đối chiếu mọi kích thước với căn phòng và món đồ thực tế. Các ảnh là minh họa AI, không đại diện cho dự án hay sản phẩm cụ thể.

    Phòng khách căn hộ nhỏ với sofa sáng màu và lối đi thông thoáng.
    Hình minh họa AI; không phải ảnh dự án thực tế.

    1. Xác định phòng khách cần phục vụ việc gì

    Trước khi chọn đồ, hãy ghi ra những hoạt động diễn ra thường xuyên: ngồi trò chuyện, xem TV, đọc sách, chơi cùng trẻ nhỏ hay nối liền với khu vực ăn uống. Chọn một hoặc hai nhu cầu quan trọng nhất để làm tiêu chí sắp xếp; không cần cố đưa mọi hoạt động vào cùng một bố cục.

    Ghi thêm ai sẽ dùng phòng, món nào đang có và món nào chắc chắn được giữ lại. Ví dụ giả định: nếu lối ra ban công đi xuyên qua phòng khách, hãy giữ tuyến đi đó thông thoáng trước khi quyết định đặt bàn phụ hoặc ghế rời. Đây là ví dụ minh họa; căn phòng của bạn có thể cần thứ tự ưu tiên khác.

    2. Đo mặt bằng và đánh dấu các điểm cố định

    Vẽ sơ đồ đơn giản của căn phòng rồi ghi chiều dài các bức tường, vị trí cửa ra vào, cửa sổ, ban công, ổ cắm và những món đồ không thể di chuyển. Đánh dấu hướng mở của cửa; một cánh cửa mở vào trong có thể chiếm đúng khoảng bạn định đặt tủ hoặc ghế.

    Đo các món đồ muốn giữ lại, thay vì chỉ ghi tên chúng. Nếu dự định mua món mới, lưu số đo chiều rộng, chiều sâu và chiều cao từ thông tin của chính sản phẩm đó. Kiểm tra cả đường vận chuyển qua cửa, hành lang, cầu thang hoặc thang máy; căn phòng có chỗ đặt không đồng nghĩa món đồ chắc chắn đi lọt tới đó.

    3. Vẽ lối đi trước khi đặt nội thất

    Dùng mũi tên trên sơ đồ để nối cửa ra vào với những nơi bạn cần tới mỗi ngày, chẳng hạn ban công, bếp hoặc hành lang. Sau đó kiểm tra xem đường đi có cắt qua khu vực mọi người thường ngồi hay vướng cánh cửa, ngăn kéo và ghế cần kéo ra không.

    Nếu lối đi bị chia nhỏ, hãy thử đổi vị trí bàn trà, ghế phụ hoặc tủ trước khi bỏ món đồ chính. Mục tiêu không phải tạo một đường đi giống hệt mẫu trên mạng mà là để những người trong nhà di chuyển và sử dụng phòng theo cách quen thuộc của họ.

    4. Chọn món nội thất chính theo số đo thực tế

    Với nhiều gia đình, sofa là món chiếm nhiều diện tích và ảnh hưởng đến vị trí các món còn lại. Nếu phòng khách chủ yếu để ngồi trò chuyện, hãy bắt đầu bằng kích thước sofa phù hợp với mặt bằng và nhu cầu chỗ ngồi. Nếu phòng còn dùng cho việc khác, cân nhắc xem chiếc sofa có làm cản lối đi hoặc lấy mất vị trí cần thiết cho hoạt động đó không.

    Đừng chọn chỉ theo ảnh chụp. So sánh số đo sản phẩm với sơ đồ, lưu ý tay vịn, phần tựa và khoảng mở của các cánh tủ xung quanh. Khi có thể, hãy thử ngồi hoặc kiểm tra trực tiếp kiểu dáng và cách vệ sinh; nếu chỉ xem trực tuyến, đọc kỹ thông tin sản phẩm và hỏi nơi bán về điểm còn thiếu.

    5. Thử vị trí bằng băng keo giấy

    Khi đã có số đo, dùng băng keo giấy đánh dấu chiều rộng và chiều sâu dự kiến của sofa, bàn trà hoặc tủ trên sàn. Bước này giúp bạn nhìn thấy phần diện tích mỗi món chiếm và kiểm tra bố cục trong căn phòng thật trước khi đặt mua.

    Băng keo giấy đánh dấu vị trí đồ nội thất và lối đi trong phòng khách.
    Hình minh họa AI; vạch băng keo không thay cho việc đo kích thước thực tế.

    Đi thử từ cửa vào chỗ ngồi, kéo ghế ra, mở ngăn kéo và kiểm tra các cửa trong phòng. Nếu một thao tác bị vướng, thay đổi vạch đánh dấu rồi thử lại. Đừng xem đường băng keo trong ảnh là kích thước chuẩn; số đo phải lấy từ món đồ và căn nhà của bạn.

    6. Bố trí chỗ lưu trữ gần nơi phát sinh nhu cầu

    Liệt kê những thứ thường để ở phòng khách như sách, điều khiển, đồ chơi hoặc chăn mỏng, rồi chọn vị trí cất dựa trên thói quen sử dụng. Đồ cần lấy thường xuyên nên ở nơi dễ tiếp cận; đồ ít dùng có thể đặt ở vị trí khác nếu không làm cản đường.

    Trước khi thêm tủ hoặc kệ, kiểm tra cánh tủ mở ra đâu, món đồ có che ổ cắm hay cửa sổ không và việc lau dọn có thuận tiện không. Nếu một chỗ lưu trữ không giải quyết nhu cầu cụ thể, hãy để trống vị trí đó thay vì mua thêm chỉ để lấp khoảng trống.

    7. Chọn màu sắc và bề mặt trong điều kiện ánh sáng thật

    Đặt mẫu màu hoặc vật liệu cạnh tường, sàn và món đồ đang có để xem chúng đi cùng nhau ra sao. Quan sát ở nơi bạn dự định đặt đồ và vào các thời điểm khác nhau trong ngày; ảnh trên màn hình có thể không thể hiện đúng màu sắc trong căn phòng của bạn.

    Chọn bề mặt dựa trên cách gia đình sử dụng và khả năng chăm sóc mà bạn sẵn sàng duy trì. Đọc hướng dẫn vệ sinh của sản phẩm cụ thể trước khi mua, nhất là khi nhà có trẻ nhỏ, thú cưng hoặc thường xuyên ăn uống trong phòng khách. Không có một màu hay chất liệu phù hợp với mọi căn nhà.

    8. Dùng checklist trước khi chốt lựa chọn

    Trước khi mua, ghi mỗi món dự định chọn vào một danh sách ngắn và kiểm tra lần lượt:

    • Món này phục vụ nhu cầu nào trong phòng?
    • Kích thước đã được so với mặt bằng và lối đi chưa?
    • Cửa, ngăn kéo, ghế và các thiết bị xung quanh có mở hoặc sử dụng được không?
    • Món đồ có vận chuyển lọt qua lối vào và các đoạn đường tới phòng không?
    • Thông tin sản phẩm có đủ để hiểu kích thước, chất liệu và cách chăm sóc không?
    • Nếu bỏ món này khỏi kế hoạch, hoạt động nào trong phòng sẽ bị ảnh hưởng?

    Những lỗi dễ gặp khi bố trí phòng khách nhỏ

    • Chọn đồ từ ảnh trước khi đo: hãy dùng số đo thật của sản phẩm và căn phòng để kiểm tra lại.
    • Mua nhiều món cùng lúc: ưu tiên món đáp ứng nhu cầu chính, rồi thử bố cục trước khi thêm đồ.
    • Quên cánh cửa và đường vận chuyển: đánh dấu hướng mở cửa, đo lối vào và xác nhận cách giao nhận với nơi bán.
    • Cố sao chép nguyên mẫu: lấy ý tưởng từ hình ảnh nhưng điều chỉnh theo cửa, cửa sổ, ánh sáng và thói quen của nhà mình.

    Câu hỏi thường gặp

    Nên chọn sofa trước hay đo phòng trước?

    Hãy đo và vẽ mặt bằng trước. Sau đó chọn sofa theo hoạt động chính, số đo còn lại và lối đi cần giữ. Làm ngược lại dễ khiến các món khác phải xoay quanh một lựa chọn không vừa với căn phòng.

    Sofa có bắt buộc kê sát tường không?

    Không có một vị trí chung cho mọi phòng khách. Hãy dựa vào cửa, lối đi, điểm nhìn và hoạt động trong phòng; thử vị trí bằng sơ đồ hoặc băng keo trước khi quyết định.

    Có nên mua cả bộ nội thất đồng bộ?

    Chỉ chọn cả bộ khi từng món đều phù hợp với nhu cầu và mặt bằng. Bạn cũng có thể chọn riêng từng món, miễn là kiểm tra kích thước, cách sử dụng và sự hài hòa với những đồ đang giữ lại.

    Tóm lại, cách bố trí phòng khách nhỏ nên bắt đầu từ thói quen, số đo và đường đi. Khi đã kiểm tra các điểm đó, bạn có thể so sánh kiểu dáng, màu sắc và vật liệu với căn phòng thực tế. Vanodio ghi rõ các phương án trên trang Dự án là minh họa; hãy xem chúng như ý tưởng tham khảo, không phải thông số cho căn nhà của bạn.